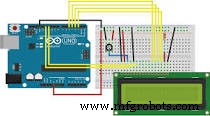
Teman AI LCD: Kawan Interaktif Anda
Komponen dan Perlengkapan
- Arduino UNO (1)
- Potensiometer rotary (generic) (1)
- Kabel jumper (generic) (19)
- Breadboard (generic) (1)
- Tombol (4)
- Resistor 100 ohm (3)
- Resistor 221 ohm (1)
- LCD Standar Adafruit - 16x2 Putih pada Biru (1)
Aplikasi dan Layanan Online
- Arduino IDE
- Arduino Web Editor
Tentang Proyek Ini
Untuk memberi Anda teman selama waktu kesepian.
Kode
Anda dapat memperluasnya jika ingin, cukup posting kode yang diperluas dalam komentar! Cukup salin dan tempel ini setelah “to be continued.” -->
#include <LiquidCrystal.h> LiquidCrystal lcd(12, 11, 5, 4, 3, 2); const int buttonPin = 9; int buttonState = 0; const int buttonPin2 = 10; const int buttonPin3 = 8; void setup() { // put your setup code here, to run once: pinMode(buttonPin, INPUT); pinMode(buttonPin2, INPUT); pinMode(buttonPin3, INPUT); lcd.begin(16, 2); lcd.print(" (.) (.) Hi I"); lcd.setCursor(2, 2); lcd.print("(____) am Robi"); delay(2000); lcd.clear(); lcd.print(" (.) (.) You "); lcd.setCursor(2, 2); lcd.print(" ____ can talk"); delay(2000); lcd.clear(); lcd.print(" (-) (-) to "); lcd.setCursor(2, 2); lcd.print(" (____) me!"); delay(2000); lcd.clear(); lcd.print(" (.) (.)Tap"); lcd.setCursor(2, 2); lcd.print(" ____ the"); delay(2000); lcd.clear(); lcd.print(" (.) (.) but"); lcd.setCursor(2, 2); lcd.print(" (____) ton"); delay(2000); } void loop() { buttonState = digitalRead(buttonPin); if (buttonState == HIGH) { lcd.clear(); lcd.print("Hello I am"); lcd.setCursor(2, 2); lcd.print("Alexander"); delay(2000); lcd.clear(); lcd.print(" (*) (*) Hi!"); lcd.setCursor(2, 2); lcd.print(" (____)"); delay(2000); lcd.clear(); lcd.print(" (.) (.)Let's"); lcd.setCursor(2, 2); lcd.print(" ____ play"); delay(2000); lcd.clear(); lcd.print("OK!"); lcd.setCursor(2, 2); lcd.print(" But Where?"); delay(2000); lcd.clear(); lcd.print(" (.) (.) Park"); lcd.setCursor(2, 2); lcd.print(" (____)or home?"); delay(2000); lcd.clear(); lcd.print("Left = Park"); lcd.setCursor(2, 2); lcd.print("Right = Home"); delay(2000); } buttonState = digitalRead(buttonPin2); if (buttonState == HIGH) { lcd.clear(); lcd.print("You go to"); lcd.setCursor(2, 2); lcd.print("the Park..."); delay(2000); lcd.clear(); lcd.print(" (.) (.) Lets"); lcd.setCursor(2, 2); lcd.print(" ____ swing!"); delay(2000); lcd.clear(); lcd.print("OK!"); lcd.setCursor(2, 2); lcd.print("You swing..."); delay(2000); lcd.clear(); lcd.print(" (*) (*) I'm"); lcd.setCursor(2, 2); lcd.print(" (___) tired"); delay(2000); lcd.clear(); lcd.print("Me too!"); lcd.setCursor(2, 2); lcd.print("Lets drink."); delay(2000); lcd.clear(); lcd.print(" (.) (.) Yeah"); lcd.setCursor(2, 2); lcd.print(" (____) "); delay(2000); lcd.clear(); lcd.print("You go buy"); lcd.setCursor(2, 2); lcd.print("a drink..."); delay(2000); lcd.clear(); lcd.print(" (*) (*) Ahh!"); lcd.setCursor(2, 2); lcd.print(" ____ OW!!"); delay(2000); lcd.clear(); lcd.print("What?"); lcd.setCursor(2, 2); lcd.print("..."); delay(2000); lcd.clear(); lcd.print(" (*) (*)Water"); lcd.setCursor(2, 2); lcd.print(" []got in my eye"); delay(2000); lcd.clear(); lcd.print("To be "); lcd.setCursor(2, 2); lcd.print("continued."); delay(2000); } buttonState = digitalRead(buttonPin3); if (buttonState == HIGH) { lcd.clear(); lcd.print("You go to"); lcd.setCursor(2, 2); lcd.print("your home..."); delay(2000); lcd.clear(); lcd.print(" (.) (.) WOW!"); lcd.setCursor(2, 2); lcd.print(" ___ Cool!"); delay(2000); lcd.clear(); lcd.print("You play for"); lcd.setCursor(2, 2); lcd.print("the day..."); delay(2000); lcd.clear(); lcd.print("To be"); lcd.setCursor(2, 2); lcd.print("continued."); delay(2000); lcd.clear(); } }
Skematik