Buat Kalkulator Dasar dengan Arduino UNO – Proyek Mudah
Komponen dan perlengkapan
Aplikasi dan layanan online
Tentang proyek ini
Suatu hari, guru matematika saya bertanya padaku saat sedang membicarakan arduino : “Bisakah kamu melakukan matematika dengan itu?”. Saya menjawab “Saya tidak tahu”, dan itu membuat saya berpikir tentang bagaimana membuatnya terjadi. Lalu, saya agak tahu cara melakukannya dan ingin berbagi sekarang.
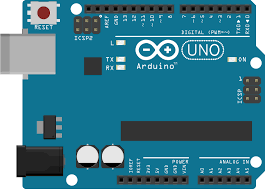
Jadi inilah! Cara sangat sederhana untuk melakukan matematika dengan arduino. Untuk proyek saya, saya menggunakan arduino UNO, tetapi saya percaya itu bekerja dengan semuanya.
Langkah demi langkahnya sangat sederhana:
- Hubungkan papan dengan komputer
- Tulis perhitungan yang valid (Lihat kode untuk lebih banyak petunjuk)
Saya berencana untuk membuat kalkulator yang lebih baik, tetapi untuk saat ini itu hanya itu : cara untuk melakukan matematika dasar. Jika Anda ingin kalkulator “yang lebih baik”, silakan beri tahu saya.
Tetap terhubung untuk melihat kalkulator “yang lebih baik”! Semoga bertemu segera!
Kode
KODE UNTUK KALKULATORArduino
Anda memasukkan angka dan sinyal bersama, seperti "2+3", atau 8*2, dan itu memberikan hasil
/* Serial arduino calculator in this project, you can make basic arithmetic with the help of arduino, almost like a very rustic calculator. It accepts two numbers and a signal, and makes the operation, witch can be of +, -, * or /. E.G. : send "2+3" (Without quotes and with no space separating the info), and arduino answers 5. Digit "7-3" and arduino te responde com 4. Criado por João Paulo Rodrigues Poltronieri This code is on public domain */ // first of all, create variables to store // the information sent to arduino lng number1; // first number of the calculation, // sent through the Serial monitor // If you take a look, it's a long variable, so // we're able to use big numbers long number2; // second number sent through the SM char calSignal; // create a char variable to store // the calculation signal. long result; // result of the calculation void setup() { Serial.begin(9600); // begins serial communications Serial.println("Send me a calculation"); Serial.println("E.G. : 2+3"); Serial.println(); // prints this to test serial communication, and // prints a line space } void loop() { while(Serial.available() > 0) { // while there are data being sent to arduino, number1 = Serial.parseInt(); // number1 will be the first number // Note the use of "Serial.parseInt, so, // in case you use 23, it stores in // number1 the number 23 // if we used Serial.read(), it would // only store 2 calSignal = Serial.read(); // calSignal will be the first // info after the first number number2 = Serial.parseInt(); // stores the second // number in number2 resolucao(); // Custom function to solve the calculations Serial.println("Resultado = "); Serial.println(result); // Prints the result of the calculation Serial.println(); // jumps a line Serial.println("Outra conta, por favor"); // prints Serial.println(); // jumps a line } } void resolucao() { // Custom function that // solves the calculations switch (calSignal) { // Here we use "switch...case" to save some space on // the sketch. It's, basically, a function that verifies // various "if" statements. // Here, it verifies what's the value held by // calSigna. Basically, it verifies the "signal" // of the calculation case '+' : // if calSignal is '+' result = number1 + number2; // sums the numbers // and makes result hold the value of the calculation break; // break to exit the "case" case '+' : // if calSignal is '+' result = number1 - number2; // subtracts the numbers // and makes result hold the value of the calculation break; // break to exit the "case" case '+' : // if calSignal is '+' result = number1 * number2; // multiplies the numbers // and makes result hold the value of the calculation break; // break to exit the "case" case '/' : // se calSignal for '/' result = number1 / number2; // divides the numbers // and makes result hold the value of the calculation // PS: in case the division isn't exact, the result // will be the nearest integrer break; // break to exit the "case" default : // If it's not any of these... Serial.println("CONTA INVÁVIDA"); // Creates an "error" Serial.println(); resultado = 0; } } Skematik
Dasarnya, hanya papan yang diperlukan, sebenarnya