Bangun Termometer Arduino Terhubung Web dengan Sensor DS18B20
Komponen dan Perlengkapan
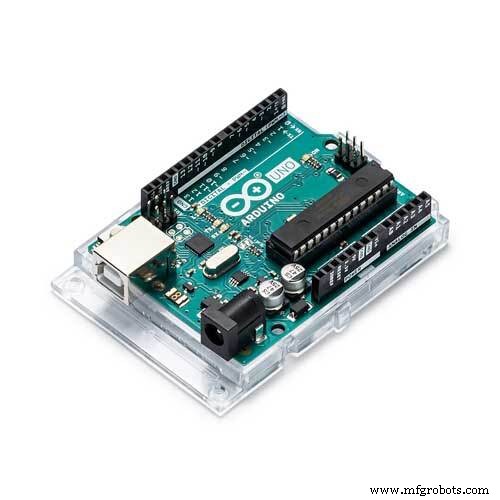 | | × | 1 | |
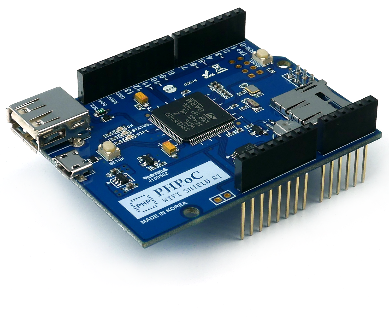 | | PHPoC WiFi Shield untuk Arduino |
| × | 1 | |
| | Sensor suhu Adafruit DS18B20 |
| × | 1 | |
| | × | 1 | |
| | Tab Penyusut Panas (Heat Shrink Tube) |
| × | 1 | |
Tentang Proyek Ini
Jika Anda pemula, Anda dapat mempelajari tentang WiFi dan sensor pada Arduino melalui tutorial WiFi dan Arduino serta sensor suhu DS18B20.
Saya telah membuat proyek serupa menggunakan hanya PHPoC di sini.
Demo
Aliran Data
Arduino → PHPoC WiFi Shield → Web browser
Arduino membaca suhu dari sensor dan mengirimkan nilai suhu ke PHPoC WiFi Shield. Saat menerima nilai suhu, PHPoC WiFi Shield mengirimkannya ke Web Browser melalui websocket. Fungsi JavaScript memvisualisasikan nilai suhu pada antarmuka pengguna (UI).
Catatan: PHPoC shield memiliki program bawaan untuk mentransfer data dari Arduino ke web browser. Oleh karena itu, kita tidak perlu mengatur hal tersebut secara manual.
Apa yang Perlu Kita Lakukan
- Atur informasi WiFi untuk PHPoC shield (SSID dan sandi)
- Unggah antarmuka web (UI) baru ke PHPoC shield
- Tulis kode Arduino
Mengatur Informasi WiFi untuk PHPoC Shield
Lihat petunjuk ini.
Unggah Antarmuka Web Baru ke PHPoC Shield
- Unduh kode sumber PHPoC remote_thermometer.php (di bagian kode).
- Unggah ke PHPoC shield menggunakan PHPoC debugger sesuai petunjuk ini.
Menulis Kode Arduino
- Instal tiga library berikut: PHPoC Library for Arduino, OneWire, dan Dallas Temperature (lihat petunjuk).
- Unggah kode Arduino (di bagian kode) ke Arduino
Pengujian
- Klik tombol serial pada Arduino IDE untuk melihat alamat IP.
- Buka web browser, ketik
https:// ganti_dengan_alamat_ip/remote_thermometer.php - Klik tombol connect dan uji coba.
Kit Starter Arduino Terbaik untuk Pemula
Jika Anda mencari kit Arduino, lihat Kit Arduino Terbaik untuk Pemula.
Referensi Fungsi
- Serial.begin()
- Serial.println()
- delay()
- millis()
- for loop
- while loop
- if else
- loop()
- setup()
- String.toInt()
- String.substring()
- String.indexOf()
- String.remove()
- String.equals()
Kode
- Kode Arduino
- remote_thermometer.php
Kode ArduinoArduino
#include <OneWire.h> #include <DallasTemperature.h> #include "SPI.h" #include "Phpoc.h" // Data wire is plugged into port 8 on the Arduino OneWire oneWire(8); DallasTemperature sensors(&oneWire); PhpocServer server(80); boolean alreadyConnected = false; void setup() { Serial.begin(9600); while(!Serial) ; sensors.begin(); Phpoc.begin(PF_LOG_SPI | PF_LOG_NET); server.beginWebSocket("thermometer"); Serial.print("WebSocket server address : "); Serial.println(Phpoc.localIP()); } void loop() { // when the client sends the first byte, say hello: PhpocClient client = server.available(); if (client) { sensors.requestTemperatures(); float temp = sensors.getTempCByIndex(0); String txtMsg = String(temp) + "\r\n"; char buf[txtMsg.length()]; txtMsg.toCharArray(buf, txtMsg.length()); server.write(buf, txtMsg.length()); delay(300); } }
remote_thermometer.phpPHP
File ini menyediakan antarmuka pengguna web. Unggah file ini ke PHPoC WiFi Shield atau PHPoC Shield sesuai petunjuk yang telah dijelaskan.
<!DOCTYPE html> <html> <head> <title>Arduino - PHPoC Shield - Thermometer</title> <meta name="viewport" content="width=device-width, initial-scale=0.7, maximum-scale=0.7"> <meta charset="utf-8"> <style> body { text-align: center; font-size: width/2pt; } h1 { font-weight: bold; font-size: width/2pt; } h2 { font-weight: bold; font-size: width/2pt; } button { font-weight: bold; font-size: width/2pt; } </style> <script> var canvas_width = 200, canvas_height = 450; var ws; var buffer = ""; function init() { var canvas = document.getElementById("remote"); canvas.width = canvas_width; canvas.height = canvas_height; var ctx = canvas.getContext("2d"); ctx.translate(canvas_width/2, canvas_height - 80); update_view(0); } function connect_onclick() { if(ws == null) { var ws_host_addr = "<?echo _SERVER("HTTP_HOST")?>"; if((navigator.platform.indexOf("Win") != -1) && (ws_host_addr.charAt(0) == "[")) { ws_host_addr = ws_host_addr.replace(/[\[\]]/g, ''); ws_host_addr = ws_host_addr.replace(/:/g, "-"); ws_host_addr += ".ipv6-literal.net"; } ws = new WebSocket("ws://" + ws_host_addr + "/thermometer", "text.phpoc"); document.getElementById("ws_state").innerHTML = "CONNECTING"; ws.onopen = ws_onopen; ws.onclose = ws_onclose; ws.onmessage = ws_onmessage; } else ws.close(); } function ws_onopen() { document.getElementById("ws_state").innerHTML = "<font color='blue'>CONNECTED</font>"; document.getElementById("bt_connect").innerHTML = "Disconnect"; ws.send("B\r\n"); update_view(0); } function ws_onclose() { document.getElementById("ws_state").innerHTML = "<font color='gray'>CLOSED</font>"; document.getElementById("bt_connect").innerHTML = "Connect"; ws.onopen = null; ws.onclose = null; ws.onmessage = null; ws = null; update_view(0); } function ws_onmessage(e_msg) { e_msg = e_msg || window.event; console.log(e_msg.data); update_view(parseFloat(e_msg.data)); } function update_view(temp) { var canvas = document.getElementById("remote"); var ctx = canvas.getContext("2d"); var radius = 70; var offset = 5; var width = 45; var height = 330; ctx.clearRect(-canvas_width/2, -350, canvas_width, canvas_height); if(ws != null) { ctx.strokeStyle="blue"; ctx.fillStyle="blue"; } else { ctx.strokeStyle="Gray"; ctx.fillStyle="Gray"; } var x = -width/2; ctx.lineWidth=2; for (var i = 0; i <= 100; i+=5) { var y = -(height - radius)*i/100 - radius - 5; ctx.beginPath(); ctx.lineTo(x, y); ctx.lineTo(x - 20, y); ctx.stroke(); } ctx.lineWidth=5; for (var i = 0; i <= 100; i+=20) { var y = -(height - radius)*i/100 - radius - 5; ctx.beginPath(); ctx.lineTo(x, y); ctx.lineTo(x - 25, y); ctx.stroke(); ctx.font="20px Georgia"; ctx.textBaseline="middle"; ctx.textAlign="right"; ctx.fillText(i.toString(), x - 35, y); } ctx.lineWidth=16; ctx.beginPath(); ctx.arc(0, 0, radius, 0, 2 * Math.PI); ctx.stroke(); ctx.beginPath(); ctx.rect(-width/2, -height, width, height); ctx.stroke(); ctx.beginPath(); ctx.arc(0, -height, width/2, 0, 2 * Math.PI); ctx.stroke(); ctx.fillStyle="#e6e6ff"; ctx.beginPath(); ctx.arc(0, 0, radius, 0, 2 * Math.PI); ctx.fill(); ctx.beginPath(); ctx.rect(-width/2, -height, width, height); ctx.fill(); ctx.beginPath(); ctx.arc(0, -height, width/2, 0, 2 * Math.PI); ctx.fill(); if(ws != null) ctx.fillStyle="#ff1a1a"; else ctx.fillStyle="Gray"; ctx.beginPath(); ctx.arc(0, 0, radius - offset, 0, 2 * Math.PI); ctx.fill(); temp = Math.round(temp); var y = (height - radius)*temp/100.0 + radius + 5; ctx.beginPath(); ctx.rect(-width/2 + offset, -y, width - 2*offset, y); ctx.fill(); if(ws != null) { ctx.fillStyle="white"; ctx.font="bold 34px Georgia"; ctx.textBaseline="middle"; ctx.textAlign="center"; ctx.fillText(temp.toString() + "°C", 0, 0); } } window.onload = init; </script> </head> <body> <p> <h1>Arduino - Web Thermometer</h1> </p> <canvas id="remote"></canvas> <h2> <p> WebSocket : <span id="ws_state">null</span> </p> <button id="bt_connect" type="button" onclick="connect_onclick();">Connect</button> </h2> </body> </html>
Skematik
1. Tempelkan PHPoC wifi shield atau PHPoC shield pada Arduino
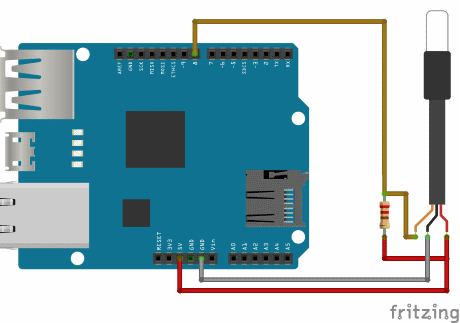
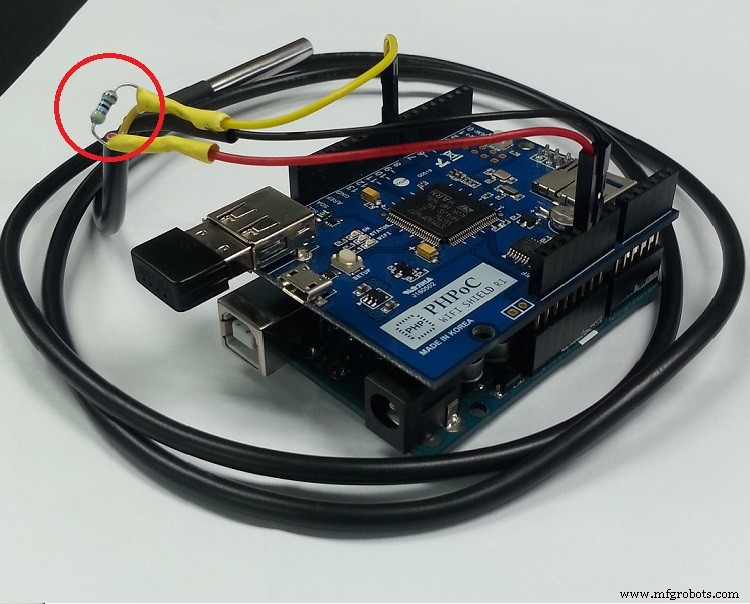
2. Rangkaikan seperti gambar di bawah ini