Bangun Kendaraan Jarak Jauh Terkontrol Android dengan Motor Shield Raspberry Pi
Komponen dan perlengkapan
Perangkat Android
×
1
Arduino 101
×
1
Raspberry Pi 2 Model B
×
1
Motor Shield Dk Electronic
×
1
Wifi Dongle Raspi Resmi
×
1
Power Bank Trust 5v
×
1
Aplikasi dan layanan online
Microsoft Windows 10 IoT Core
Arduino IDE
Microsoft Visual Studio 2015
Tentang proyek ini
Pada akhir proyek kita akan mengelola kendaraan daratan yang dikontrol oleh sensor akselerometer perangkat android
Proyek ini berisi Motor shield, raspberry pi, arduino dan perangkat motor dc.
LANGKAH 1
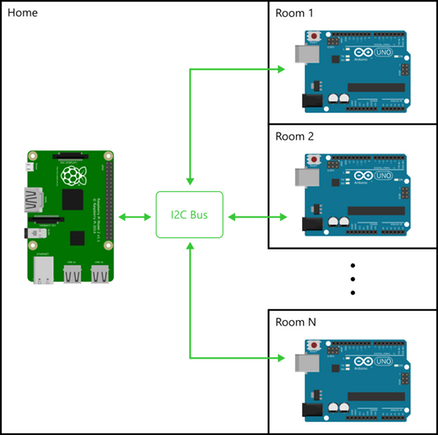
Pertama-tama kita harus membuat bus I2C antara raspberry pi dan arduino. Anda dapat melihat mengapa kami memilih I2C dari sini.
Anda dapat menemukan kode yang diperlukan yang berisi proses I2C dan motor shield seperti di bawah ini.
#include #define MyAddress 0x40 #include AF_DCMotor motorhiz(3); AF_DCMotor motoryon(4); byte DataToBeSend[1]; byte ReceivedData; int counter = 0; void setup() { Serial.begin(9600); /* Initialize I2C Slave & assign call-back function 'onReceive' on 'I2CReceived'*/ Wire.begin(MyAddress); Wire.onReceive(I2CReceived); Wire.onRequest(I2CRequest); motorhiz.setSpeed(254); motorhiz.run(RELEASE); motoryon.setSpeed(254); motoryon.run(RELEASE); } void loop() { /* Increment DataToBeSend every second and make sure it ranges between 0 and 99 */ //DataToBeSend[0] = (DataToBeSend[0] >= 99) ? 0 : DataToBeSend[0] + 1; } /* This function will automatically be called when RPi2 sends data to this I2C slave */ void I2CReceived(int NumberOfBytes) { //counter++; //String counterStr = String(counter); //Serial.println("ReceivedData :"+counterStr); /* WinIoT have sent data byte; read it */ ReceivedData = Wire.read(); int ReceivedDataInt = (int)ReceivedData; String ReceivedDataStr = String(ReceivedData); Serial.println(ReceivedDataInt); if(ReceivedDataInt >=100) //X Datası { Serial.println("DataX :"+ReceivedDataStr); if(ReceivedDataInt > 145 && ReceivedDataInt < 154) { Serial.println("RELEASE"); motorhiz.run(RELEASE); } else if(ReceivedDataInt >= 100 && ReceivedDataInt < 104) { Serial.println("RELEASE"); motorhiz.run(RELEASE); } else if(ReceivedDataInt >= 155) { ReceivedDataInt = ReceivedDataInt -155; int motorSpeed = (ReceivedDataInt * 10)+50; if(motorSpeed > 254) { motorSpeed = 254; } motorhiz.setSpeed(motorSpeed); motorhiz.run(BACKWARD); String motorSpeedStr = String(motorSpeed); Serial.println("MotorHiz :"+motorSpeedStr); } else if(ReceivedDataInt >= 105 ) { ReceivedDataInt = ReceivedDataInt -105; int motorSpeed = (ReceivedDataInt * 10)+50; if(motorSpeed > 254) { motorSpeed = 254; } motorhiz.setSpeed(motorSpeed); motorhiz.run(FORWARD); String motorSpeedStr = String(motorSpeed); Serial.println("MotorHiz :"+motorSpeedStr); } } else // Y Datası { Serial.println("DataX :"+ReceivedDataStr); if(ReceivedDataInt > 45 && ReceivedDataInt < 54) { Serial.println("RELEASE"); motoryon.run(RELEASE); } else if(ReceivedDataInt >= 0 && ReceivedDataInt < 4) { Serial.println("RELEASE"); motoryon.run(RELEASE); } else if(ReceivedDataInt >= 55) { ReceivedDataInt = ReceivedDataInt -55; int motorSpeed = (ReceivedDataInt * 12)+50; if(motorSpeed > 254) { motorSpeed = 254; } motoryon.setSpeed(motorSpeed); motoryon.run(BACKWARD); String motorSpeedStr = String(motorSpeed); Serial.println("MotorHiz :"+motorSpeedStr); } else if(ReceivedDataInt >= 5 ) { ReceivedDataInt = ReceivedDataInt -5; int motorSpeed = (ReceivedDataInt * 12)+50; if(motorSpeed > 254) { motorSpeed = 254; } motoryon.setSpeed(motorSpeed); motoryon.run(FORWARD); String motorSpeedStr = String(motorSpeed); Serial.println("MotorHiz :"+motorSpeedStr); } } } /* This function will automatically be called when RPi2 requests for data from this I2C slave */ void I2CRequest() { //Serial.println("DataToBeSend"); /*Send data to WinIoT */ //Wire.write(DataToBeSend,1); }
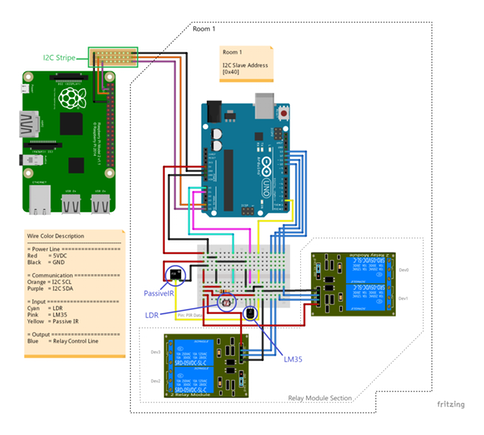
I2C's pin schema for comminication between arduino and raspberry pi in picture as shown above. It's no need to use external power supply for arduino. Arduino will get power from raspberry pi's Vout pin.
LANGKAH 2
Kode yang diperlukan untuk raspberry pi(berfungsi sebagai web server) yang mengirim data ke arduino melalui I2C seperti di bawah ini.
Code could find the codes end of the page (Code Section).
LANGKAH 3
We develop Visual Studio Cordova Android Application that sends accelerometer sensor's data to web server using ajax requests.
Code could find the codes end of the page (Code Section).
SINGKATNYA
1-) Aplikasi Android mengirim data sensor(data akselerometer ponsel android) ke web server yang berjalan di raspberry pi.
2-) Web server mengirim data(raspberry pi mendapat data dari sensor akselerometer ponsel android) ke arduino menggunakan I2C.
3-) Arduino memproses data dan menjalankan motor menggunakan motor shields.
Kode
Wiri.h I2C Comminication and moto shield android code
Android Remote Controller
Windows IOT Web Server
Wiri.h I2C Comminication and moto shield android codeArduino
I2C comminication between arduino and raspberry pi arduino code. It is for serial comminication for two devices with minumum input output source.
#include <Wire.h> #define MyAddress 0x40 #include <AFMotor.h> AF_DCMotor motorhiz(3); AF_DCMotor motoryon(4); byte DataToBeSend[1]; byte ReceivedData; int counter = 0; void setup() { Serial.begin(9600); /* Initialize I2C Slave & assign call-back function 'onReceive' on 'I2CReceived'*/ Wire.begin(MyAddress); Wire.onReceive(I2CReceived); Wire.onRequest(I2CRequest); motorhiz.setSpeed(254); motorhiz.run(RELEASE); motoryon.setSpeed(254); motoryon.run(RELEASE); } void loop() { /* Increment DataToBeSend every second and make sure it ranges between 0 and 99 */ //DataToBeSend[0] = (DataToBeSend[0] >= 99) ? 0 : DataToBeSend[0] + 1; } /* This function will automatically be called when RPi2 sends data to this I2C slave */ void I2CReceived(int NumberOfBytes) { //counter++; //String counterStr = String(counter); //Serial.println("ReceivedData :"+counterStr); /* WinIoT have sent data byte; read it */ ReceivedData = Wire.read(); int ReceivedDataInt = (int)ReceivedData; String ReceivedDataStr = String(ReceivedData); Serial.println(ReceivedDataInt); if(ReceivedDataInt >=100) //X Datası { Serial.println("DataX :"+ReceivedDataStr); if(ReceivedDataInt > 145 && ReceivedDataInt < 154) { Serial.println("RELEASE"); motorhiz.run(RELEASE); } else if(ReceivedDataInt >= 100 && ReceivedDataInt < 104) { Serial.println("RELEASE"); motorhiz.run(RELEASE); } else if(ReceivedDataInt >= 155) { ReceivedDataInt = ReceivedDataInt -155; int motorSpeed = (ReceivedDataInt * 10)+50; if(motorSpeed > 254) { motorSpeed = 254; } motorhiz.setSpeed(motorSpeed); motorhiz.run(BACKWARD); String motorSpeedStr = String(motorSpeed); Serial.println("MotorHiz :"+motorSpeedStr); } else if(ReceivedDataInt >= 105 ) { ReceivedDataInt = ReceivedDataInt -105; int motorSpeed = (ReceivedDataInt * 10)+50; if(motorSpeed > 254) { motorSpeed = 254; } motorhiz.setSpeed(motorSpeed); motorhiz.run(FORWARD); String motorSpeedStr = String(motorSpeed); Serial.println("MotorHiz :"+motorSpeedStr); } } else // Y Datası { Serial.println("DataX :"+ReceivedDataStr); if(ReceivedDataInt > 45 && ReceivedDataInt < 54) { Serial.println("RELEASE"); motoryon.run(RELEASE); } else if(ReceivedDataInt >= 0 && ReceivedDataInt < 4) { Serial.println("RELEASE"); motoryon.run(RELEASE); } else if(ReceivedDataInt >= 55) { ReceivedDataInt = ReceivedDataInt -55; int motorSpeed = (ReceivedDataInt * 12)+50; if(motorSpeed > 254) { motorSpeed = 254; } motoryon.setSpeed(motorSpeed); motoryon.run(BACKWARD); String motorSpeedStr = String(motorSpeed); Serial.println("MotorHiz :"+motorSpeedStr); } else if(ReceivedDataInt >= 5 ) { ReceivedDataInt = ReceivedDataInt -5; int motorSpeed = (ReceivedDataInt * 12)+50; if(motorSpeed > 254) { motorSpeed = 254; } motoryon.setSpeed(motorSpeed); motoryon.run(FORWARD); String motorSpeedStr = String(motorSpeed); Serial.println("MotorHiz :"+motorSpeedStr); } } } /* This function will automatically be called when RPi2 requests for data from this I2C slave */ void I2CRequest() { //Serial.println("DataToBeSend"); /*Send data to WinIoT */ //Wire.write(DataToBeSend,1); }
Android Remote ControllerC#
Android Remote Controller
No preview (download only).
Windows IOT Web ServerC#
Windows IOT Web Server
No preview (download only).
Bagian dan Kotak Khusus
Arduino to raspberry pin diagram
Skematik
for details: https://www.hackster.io/AnuragVasanwala/home-automation-0dcefc