Proses manufaktur


 |
| × | 1 | |||
| × | 1 | ||||
 |
| × | 1 | |||
 |
| × | 1 | |||
| × | 1 | ||||
| × | 1 | ||||
| × | 1 | ||||
| × | 1 | ||||
| × | 1 | ||||
 |
| × | 1 | |||
| × | 1 | ||||
 |
| × | 2 | |||
 |
| × | 1 | |||
| × | 2 | ||||
| × | 1 | ||||
| × | 1 | ||||
| × | 1 | ||||
| × | 1 | ||||
 |
| × | 1 | |||
| × | 4 | ||||
| × | 8 | ||||
 |
| × | 4 | |||
| × | 1 | ||||
| × | 1 | ||||
| × | 1 | ||||
| × | 1 | ||||
| × | 1 | ||||
| × | 1 | ||||
| × | 1 | ||||
 |
| × | 12 | |||
| × | 1 | ||||
| × | 1 | ||||
| × | 1 | ||||
| × | 1 | ||||
 |
| × | 7 |
 |
| |||
 |
| |||
 |
| |||
|
| ||||
 |
| |||
|
Pembaruan:Seperti yang terlihat di Majalah MagPi, Edisi No. 105
Inspirasi
Saya telah jatuh cinta dengan jukebox klasik selama bertahun-tahun. Sejauh tahun 2014, saya mencoba membuatnya, tetapi saya tidak memiliki keterampilan untuk membangun yang bagus. Maju cepat ke hari ini, ketika saya telah mempelajari beberapa keterampilan desain dan pencetakan 3D.
Gairah, rasa ingin tahu, dan hasrat mendorong upaya ini. Jika Anda ingin memiliki mini jukebox seperti ini, ada penawaran pasar massal yang banyak lebih murah, seperti model Victrola meja ini seharga $65 USD. Flyingangel pembuat peretas memiliki build jukebox yang hebat. Di sisi lain, ada jukebox modern siap pakai yang lebih besar (105cm / 41,3 inci H) tetapi jauh lebih mahal sekitar $795 USD. Periksa Biaya dan Upaya bagian di bawah ini untuk melihat seberapa banyak yang terlibat dalam proyek ini.
Atribusi
Proyek ini tidak akan mungkin terjadi tanpa desain jukebox 3D yang luar biasa oleh Marco Gregorio di grabcad. Ini adalah karya yang sangat detail, dibuat lebih menakjubkan karena Marco tidak memiliki jukebox fisik untuk dijadikan model, hanya apa yang bisa dia temukan di internet! Anda berhutang pada diri sendiri untuk memeriksa pekerjaan Marco...
Juga penting untuk jukebox adalah kode Arduino yang digunakan untuk membuat LED menyala untuk musik, oleh Michael Bartlett di learn.sparkfun.com.
Ikhtisar
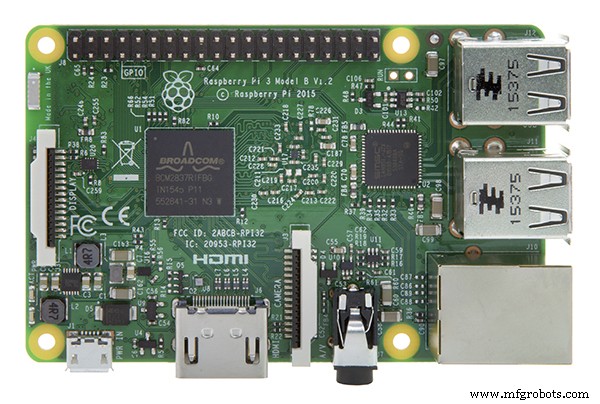
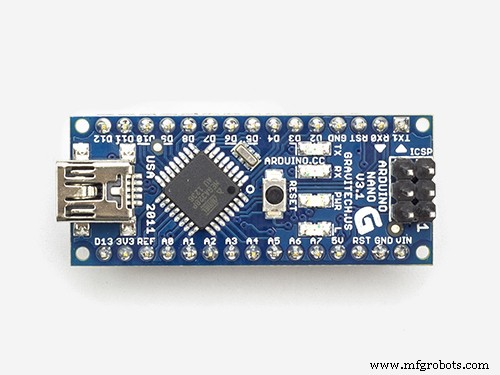
Ini adalah pemutar musik yang didukung oleh perangkat lunak Volumio gratis. Volumio menampilkan AirPlay, Spotify, Pandora, radio web, dan musik Anda sendiri yang dikontrol dari komputer, tablet, atau ponsel Anda - cukup unduh dan instal. Apa yang saya tambahkan? Casing 3D, LCD panel sentuh, dan LED yang menyala mengikuti musik. LCD ditenagai dari Raspberry Pi 3 atau 4. LED dikendalikan oleh Mikro Arduino pada papan Adafruit Perma-Proto yang terpasang di bagian atas tumpukan perangkat keras:Raspberry Pi dan IQAudio Pi Digi Amp.
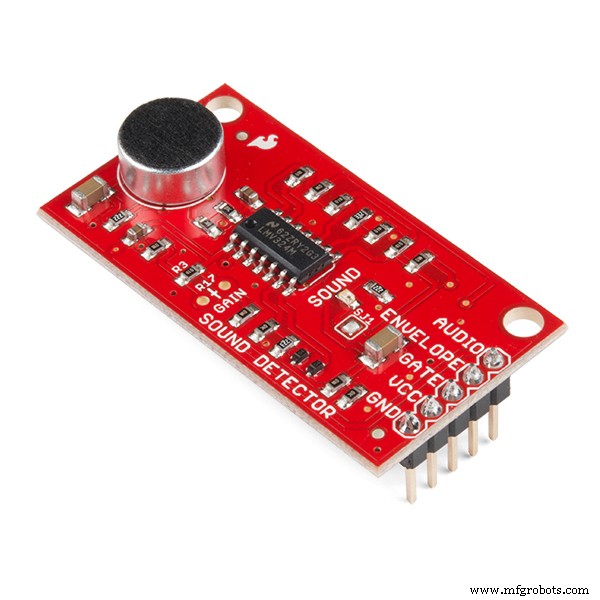
Saya menggunakan perangkat keras lama, papan amp IQAudio dan Mikro Arduino, yang saya miliki di inventaris. Pada tulisan ini, IQAudio sekarang menjadi bagian dari Raspberry Pi, dan Pi Digi Amp Plus masih tersedia, DAN kurang dari yang saya bayarkan untuk itu. Mikro Arduino sudah usang, tetapi Anda bisa menggunakan Arduino Nano atau Adafruit Itsy-Bitsy. Anda harus melakukan penyesuaian untuk penggunaan pin analog dan digital dan menyalurkan daya 5V dari Digi Amp ke papan anak (Arduino). Terakhir, Detektor Suara Sparkfun secara ajaib mengubah suara menjadi bit digital.
Marco menyediakan file STEP untuk semua komponen jukebox yang dapat saya impor ke dalam aplikasi desain Fusion 360 3D. Yang saya lakukan adalah:
Tujuan Desain
Tingkat Keterampilan:Lanjutan
Biaya:Mahal
(Semua biaya USD)
Minimal:
ATAU
Gambar di $40 atau lebih untuk kabel/konektor HDMI, sakelar, perangkat keras pemasangan, kabel jumper, header perempuan, dll. Saya memiliki banyak inventaris. Bagi saya, biaya out-of-pocket saat ini adalah sekitar $150, tersebar selama berbulan-bulan, karena saya memiliki begitu banyak persediaan. Jika Anda harus pergi keluar dan membeli semua persediaan itu... Nah, hitunglah.
Bagi saya, biayanya sepadan.
Upaya
Pencetakan 3D akan memakan waktu 75 jam atau lebih, tergantung pada printer Anda. Ada 21 bagian berbeda dengan sekitar 12 yang membutuhkan waktu berjam-jam untuk dicetak. Bagian yang tersisa memakan waktu sekitar 1-2 jam masing-masing. Dan itu dengan asumsi Anda tidak memiliki cetakan lagi.
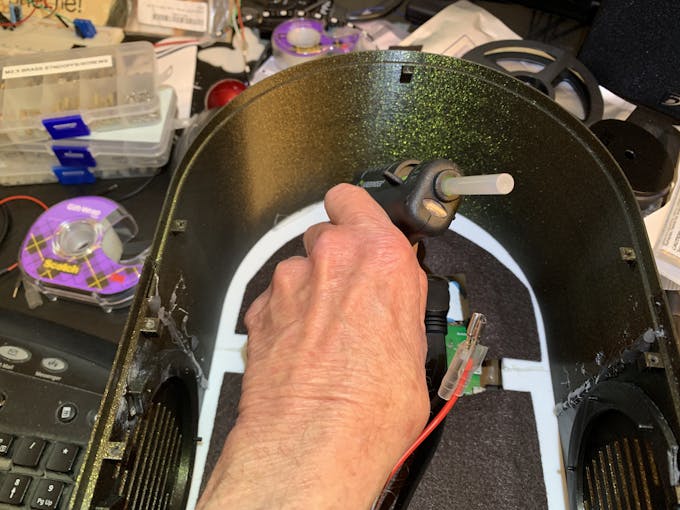
Saya menggunakan lem panas untuk mempersiapkan dan merekatkan bagian-bagian casing, dalam 4 fase. Asumsikan 3-4 jam. untuk itu. Menempelkan senar LED membutuhkan waktu sekitar satu jam untuk penyiapan dan eksekusi. Ada juga perekatan tepat pada bagian dekoratif kecil (dengan lem CA) untuk melengkapi jukebox.
Untuk elektronik, tentukan setidaknya 5 jam untuk:
Perekatan terakhir bisa memakan waktu 1-2 jam.
Kesimpulannya, selain waktu untuk mencetak semua bagian, perakitan bisa memakan waktu sekitar 12 jam atau lebih.
Unduhan
Dokumentasi, kode, dan file cetak 3D tersedia di github.
File cetak 3D juga tersedia di thingiverse.
Pencetakan 3D
Ada total 21 file bagian STL yang terpisah. Beberapa bagian memerlukan 2 salinan/cetakan.
Memulai
Pastikan Anda membaca komentar di bagian "Hal-hal" dengan cermat. Mereka memberikan informasi yang diperlukan tentang komponen yang tepat untuk digunakan. Jika Anda melakukan penggantian suku cadang, Anda harus mengetahui perubahan apa yang perlu dilakukan.
Untuk memastikan semuanya berfungsi, uji apakah semua elektronik berfungsi bersama sebelum merakit casing:
Instal Volumio
Buka halaman Memulai Volumio dan ikuti panduan penyiapan untuk Raspberry Pi Anda. Untuk memulai pengujian, pasang IQAudio Pi Digi Amp pada Raspberry Pi, Colokkan Amp ke header female pada Pi dan gunakan standoffs dari Pi ke IQAudio Amp seperti yang ditunjukkan pada foto di bawah ini. Nanti, lihat panduan ini untuk memasangnya ke bagian bawah jukebox yang dicetak 3D.
_9H4kWWGtUT.jpeg?auto=compress%2Cformat&w=680&h=510&fit=max)
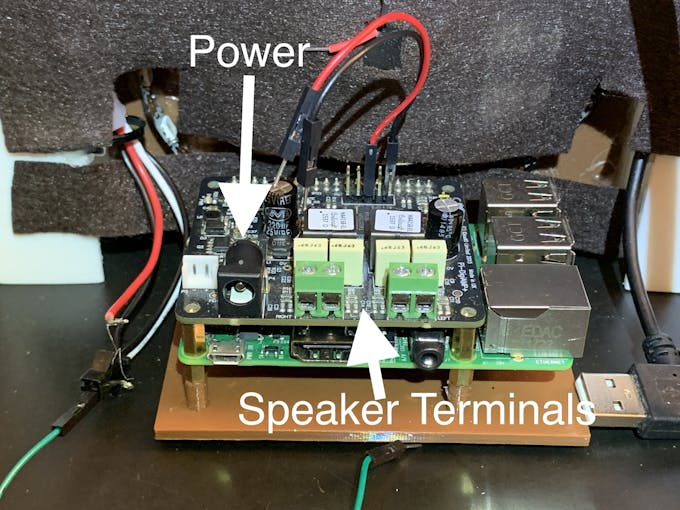
Hubungkan dua kabel jumper Female ke Male ke terminal +5V dan GND dari Digi Amp Plus, yang ditunjukkan pada foto di bawah ini. Ini akan dihubungkan ke Perma-Proto Board untuk memberi daya pada NeoPixels langsung dari Pi Digi Amp Plus.
Model Digi Amp terbaru memiliki semua pin header dari Pi yang terbuka, sehingga pin 5V dan GND akan berada di lokasi pin header Pi standar.
_4dxCv32yCp.jpeg?auto=compress%2Cformat&w=680&h=510&fit=max)
Untuk menyiapkan speaker, potong dua pasang kabel speaker (14-26 AWG) dengan panjang kira-kira 7 inci/18 cm dan pasang ke terminal speaker Anda dan terminal sekrup IQAudio. Pi akan diberdayakan dari IQAudio - JANGAN colokkan daya ke colokan listrik Pi.. Colokkan batu bata daya ke IQaudio dan coba putar beberapa radio web dari volumio.
Galeri di bawah ini menunjukkan pengaturan Volumio untuk IQAudio Pi Digi Amp Plus dan plugin Layar Sentuh (Pengaturan/Plugin/Miscellanea):
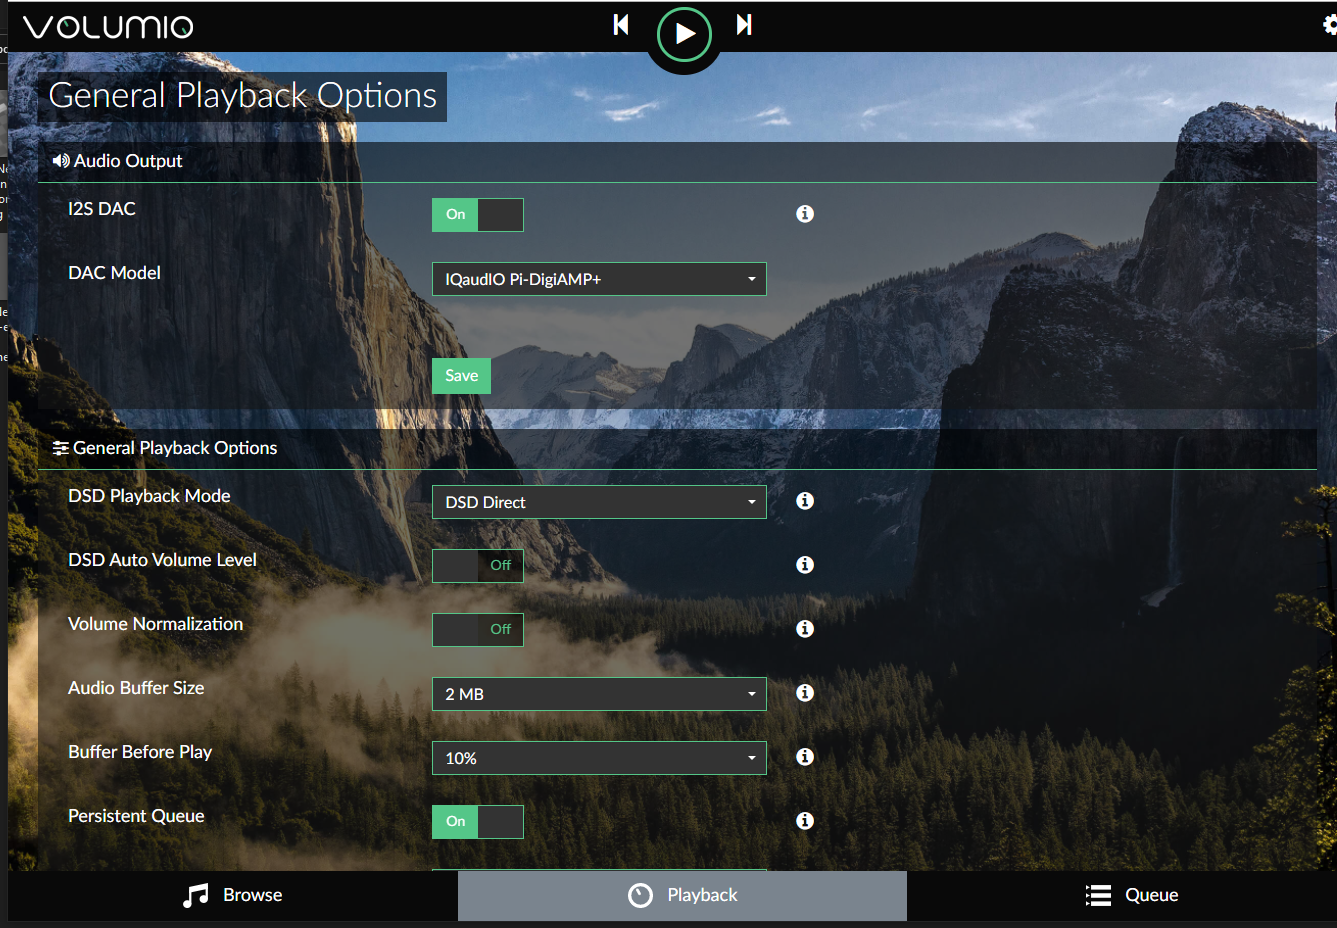
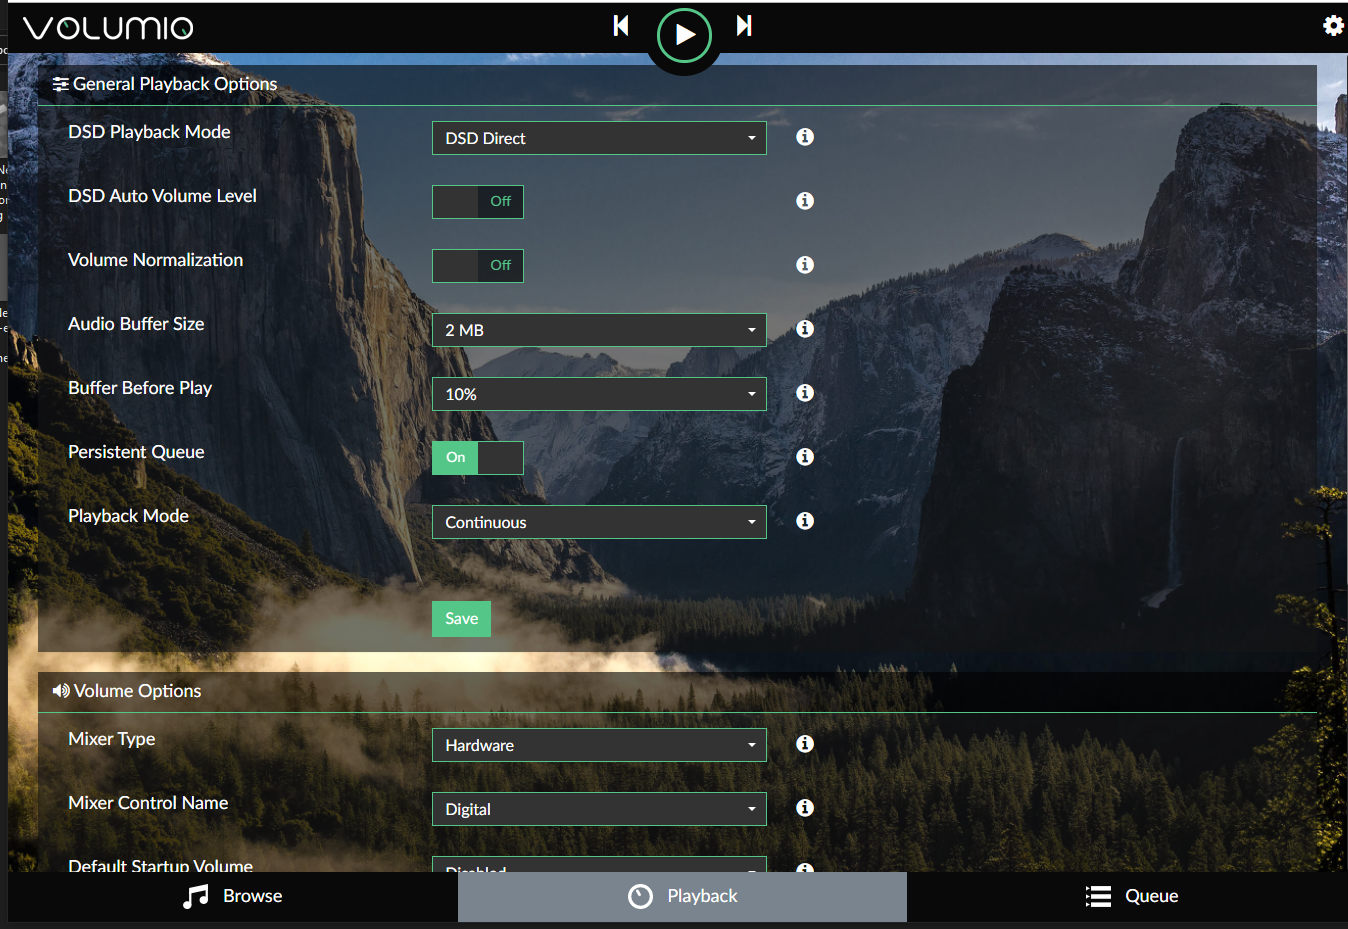
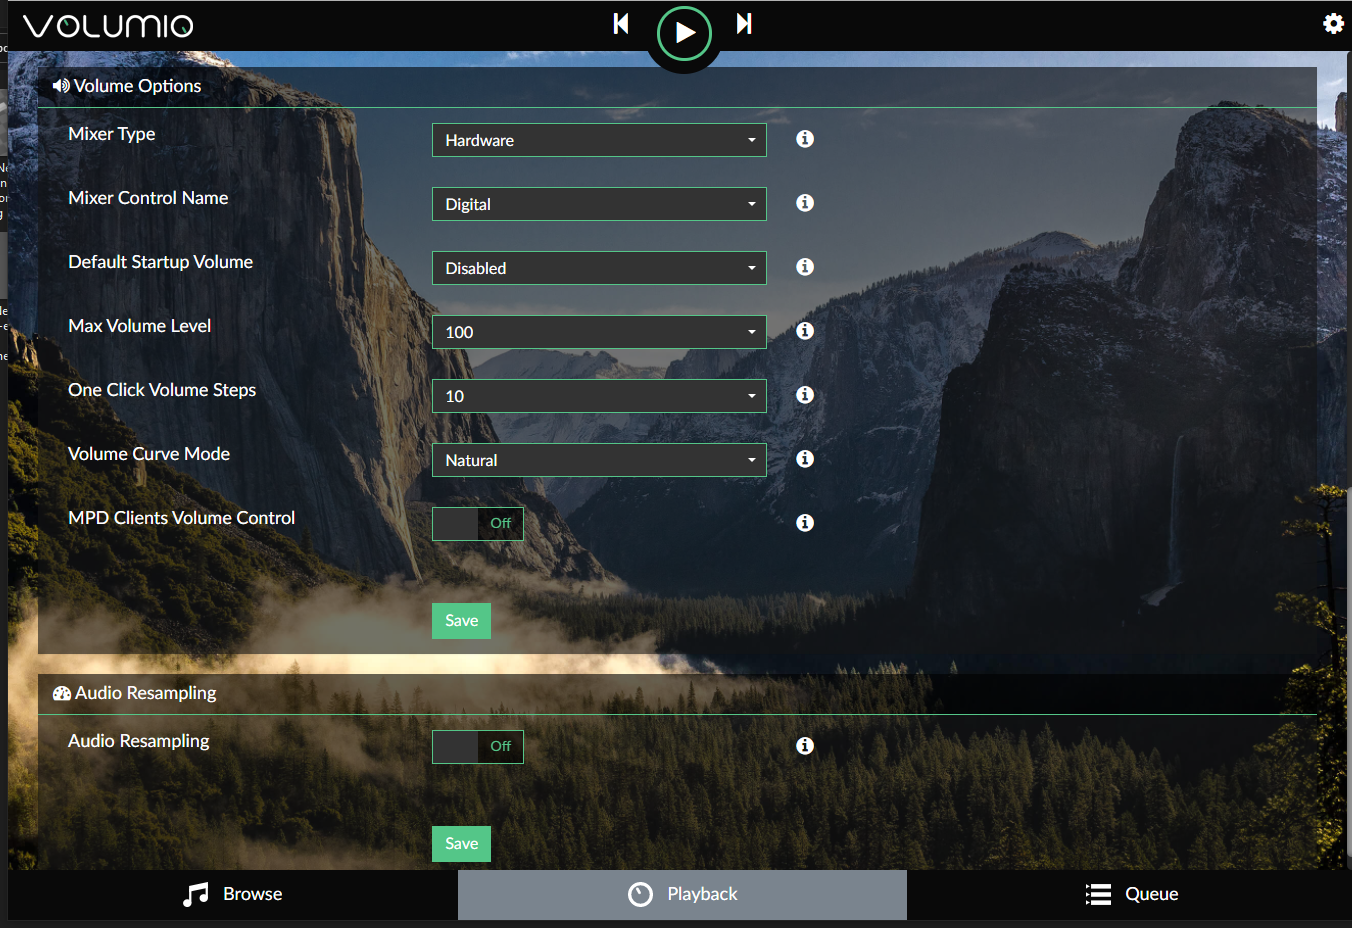
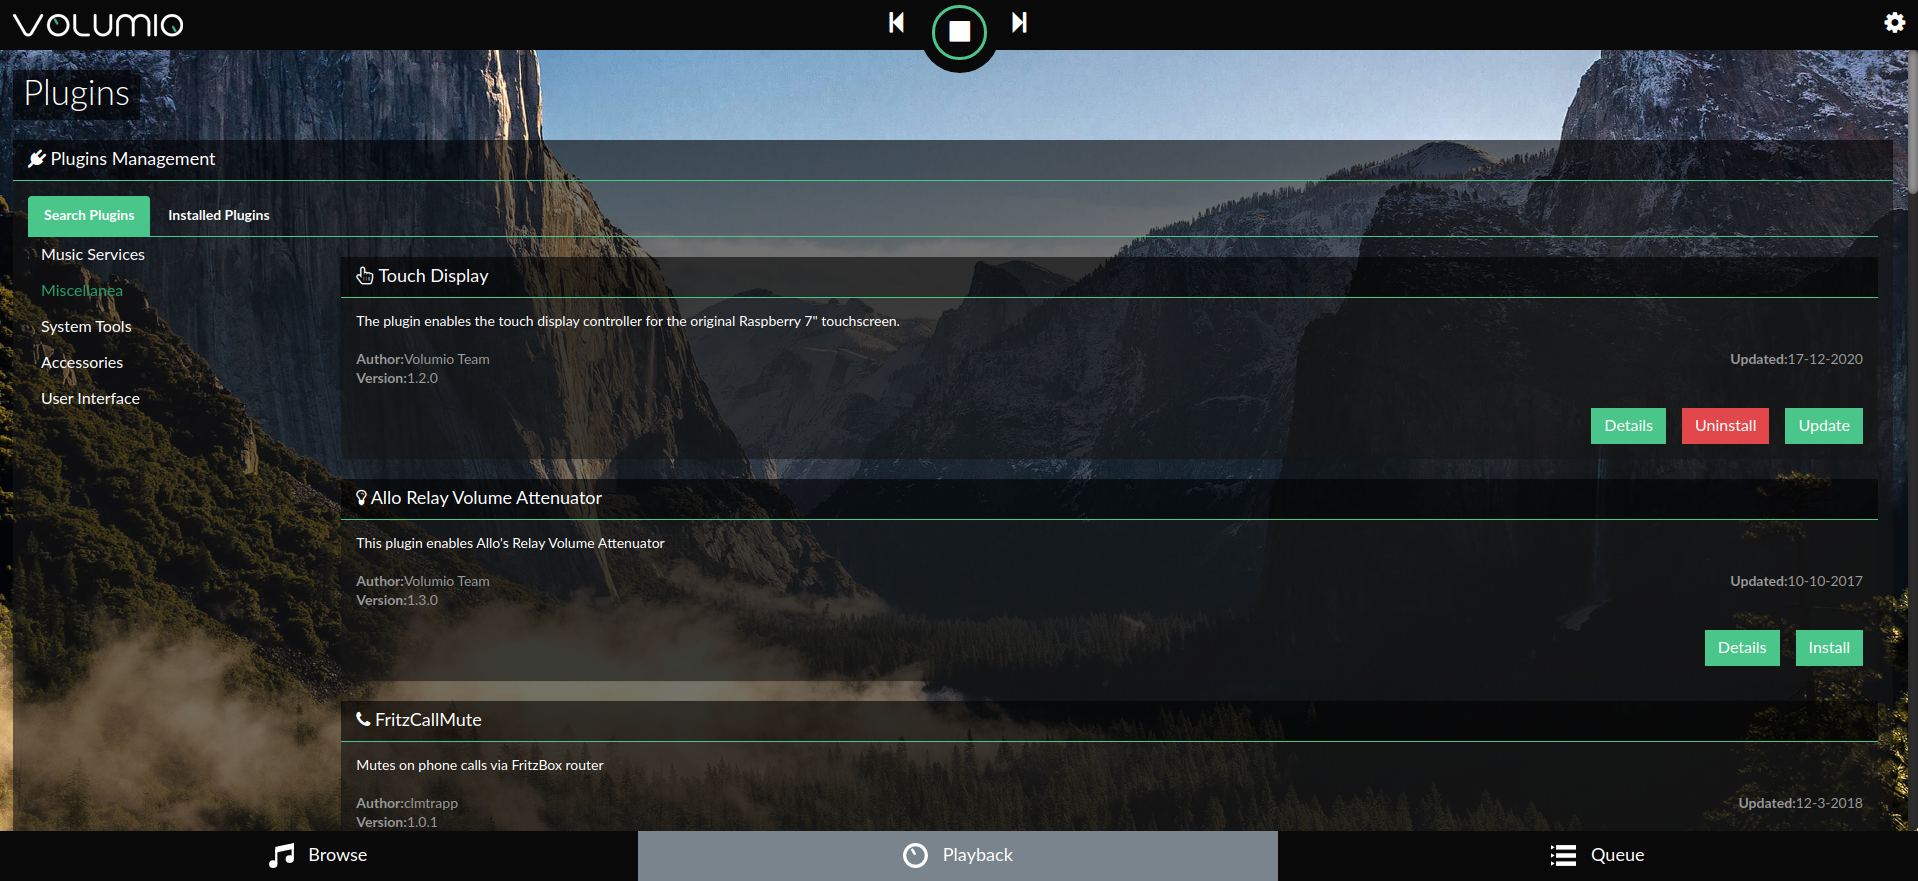
Untuk mulai menggunakan Volumio, lihat Panduan Memulai Cepat dan Langkah Pertama dengan Volumio.
Siapkan Papan Sirkuit
Faktor bentuk papan Adafruit Perma-proto sangat pas saat ditumpuk di atas Pi dan ampli IQAudio, dan menjadi papan pembawa/anak yang baik untuk Arduino.
Papan hanya terhubung ke IQAudio 5V dan GND untuk daya. Jadi, header perempuan yang biasa digunakan untuk menghubungkan ke Pi tidak digunakan.
Untuk penggunaan terbaik dari ruang yang tersedia di papan proto, arahkan papan sehingga rel bertanda “3.3V” berada di atas.
Saya memodifikasi papan proto dengan cara yang sedikit kurang umum daripada hanya memasang kabel point-to-point:
Hal-hal ini berkontribusi pada papan yang ditata dengan baik, saat diisi.
Lihat galeri foto ini untuk koneksi kabel dan modifikasi:
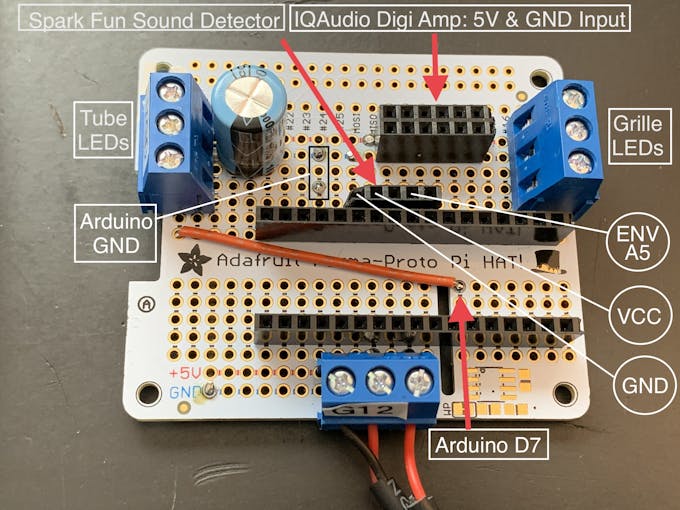
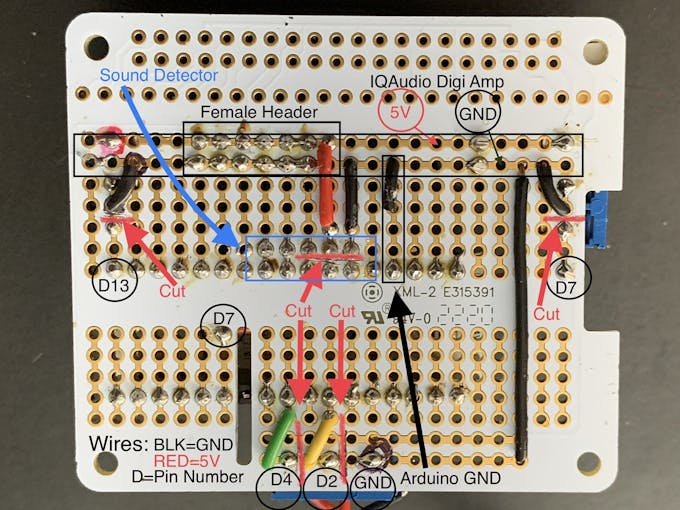
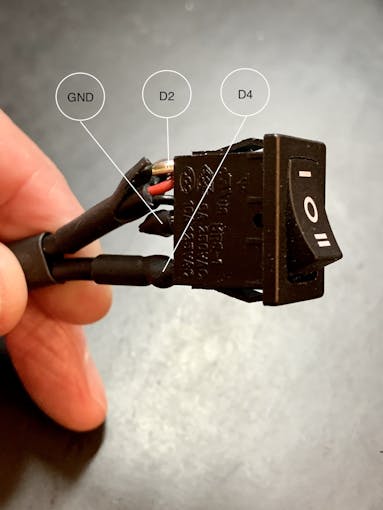
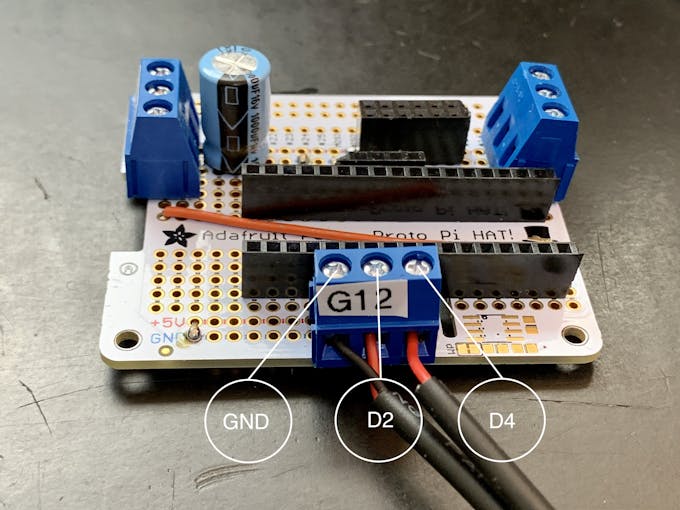
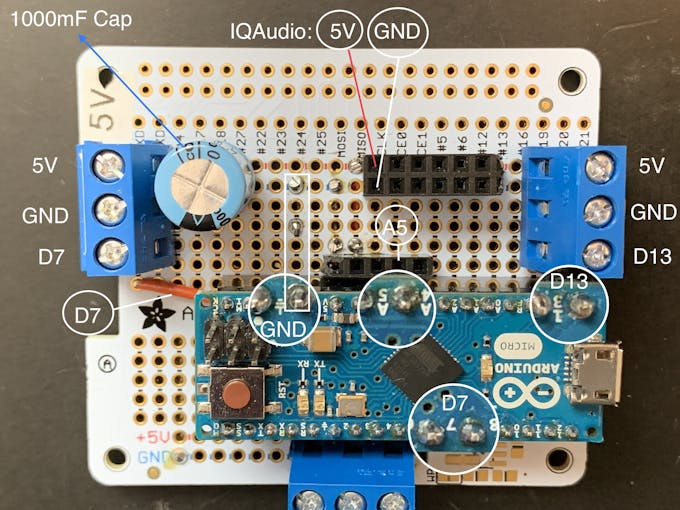
Catatan: Terminal 3-pin memiliki pitch pin-ke-pin 5.08mm. Itu persis 2x pitch standar 2.54mm vias pada proto board. Jadi, terminal/pin sekrup masing-masing terpisah 2 vias papan. Tata letak papan dan pemotongan jejak tergantung pada jarak itu. Anda tidak dapat mengganti terminal pitch 3 pin/2.54mm tanpa mengubah tata letak papan.
Tombol Pilihan Animasi
Anda juga perlu memasang sakelar rocker tiga posisi, yang ditunjukkan pada foto. Potong 3 potong kabel penghubung sekitar 7 inci/18 cm untuk sakelar ini, sebaiknya dua hitam (GND) dan satu merah (+V).
Selengkapnya tentang sakelar di bawah ini.
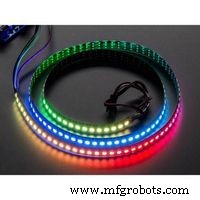
Neopiksel
Lepaskan penutup silikon dari tali Neopixel satu meter. Potong strip Neopixel menjadi dua bagian, satu 36 LED dan satu lagi dengan 22 LED. Strip pendek akan mengelilingi gril depan. Strip panjang 36 LED akan berada di tabung luar (Tabung Neon). Potong 3 potong kawat pengait sekitar 7 inci/18 cm untuk setiap senar (Anda dapat mempersingkatnya nanti). Hubungkan setiap bagian dengan kabel untuk GND, +V dan DIN, pastikan untuk mencocokkan arah DIN pada string. Tambahkan resistor yang sesuai dengan koneksi DIN (330 Ohm berfungsi).
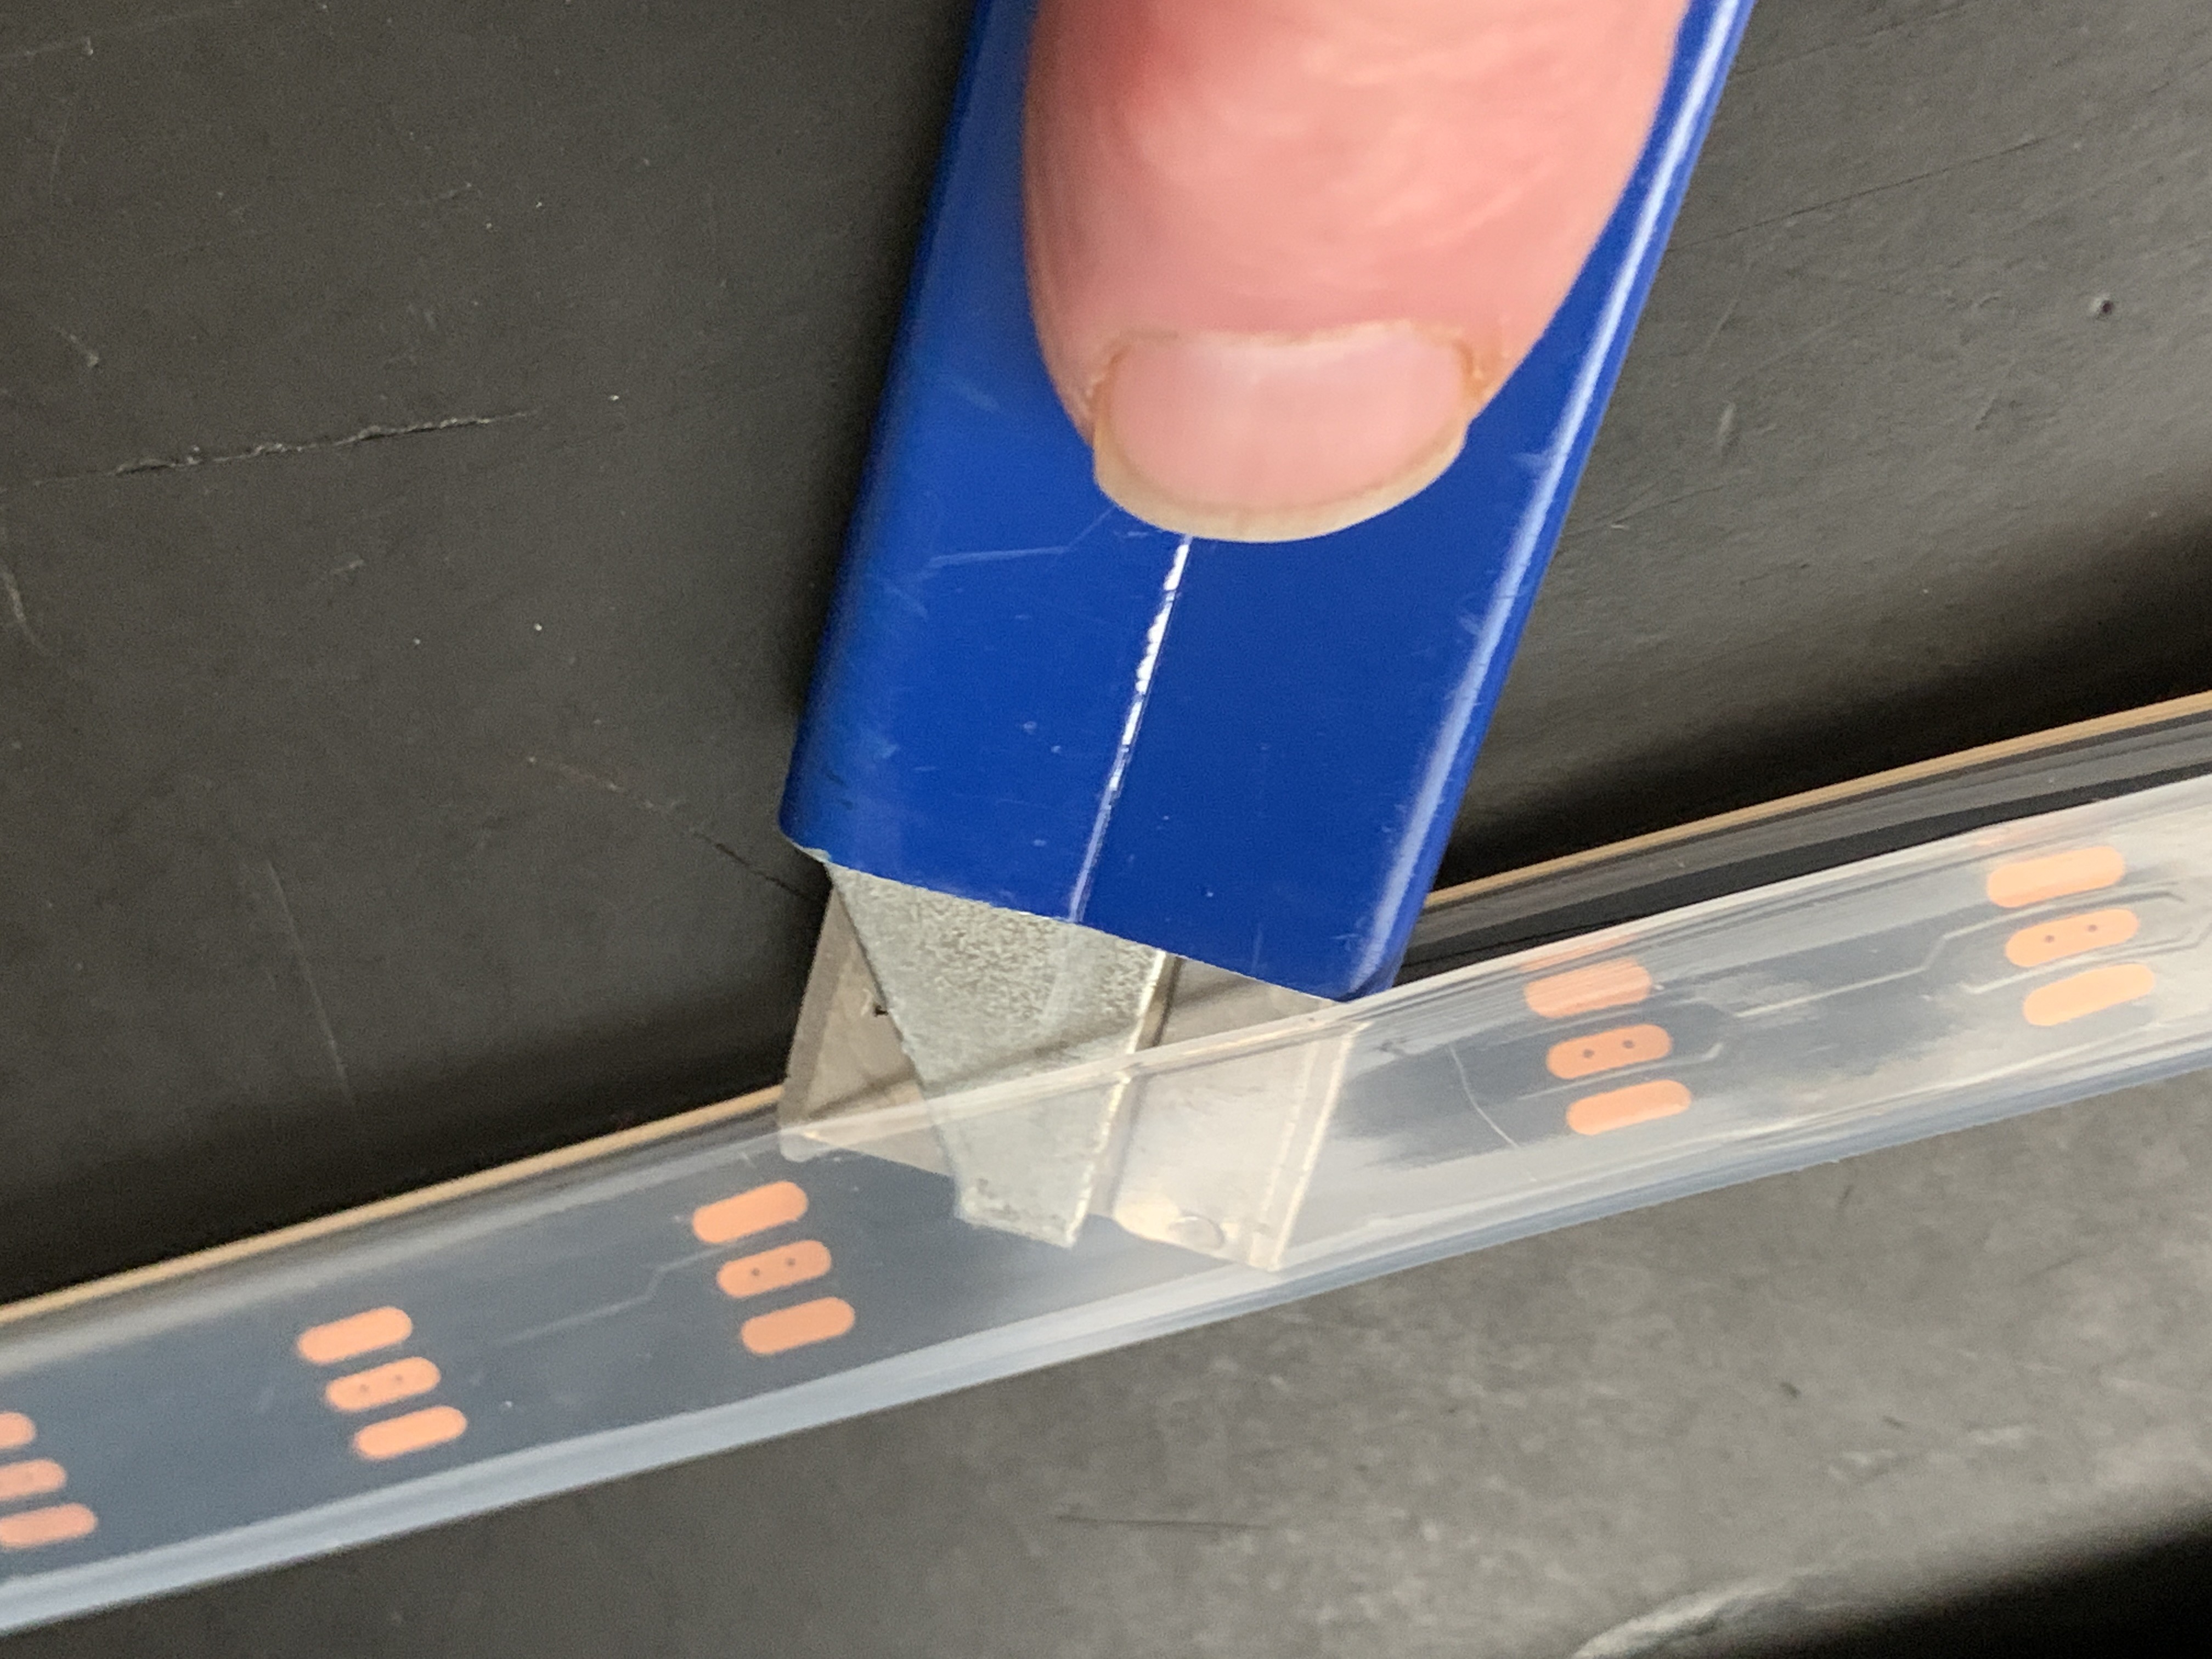
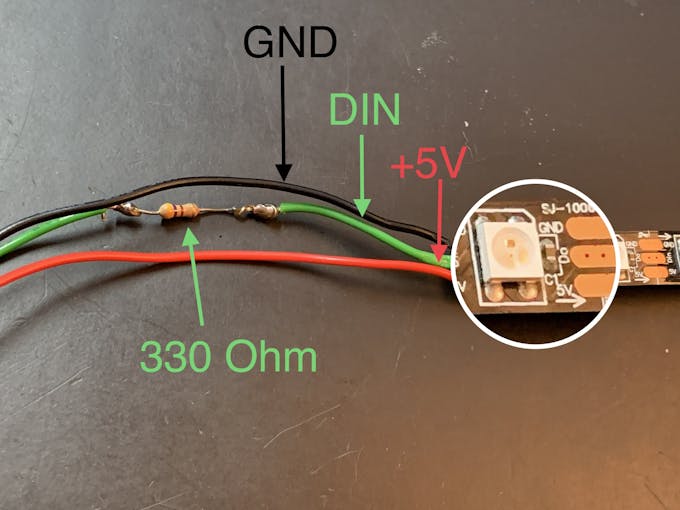
Cahaya Bintang
Pada Grille depan, terdapat insert print 3D berbentuk bintang berujung 6 (Star Light). LED RGB slow-fade yang menggunakan +V dan GND dipasang di belakang Star Light ini, dimasukkan ke dalam baffle cetak 3D untuk mencegah light bleed. Tempelkan resistor 120 ohm sebaris pada kabel jumper +V. Ini akan menjatuhkan arus dari 5V menjadi sekitar 3.4V ke LED. Ini akan digunakan di bagian Assembly/Grille Cloth, di bawah ini.
Arduino
Jika Anda belum menginstal Arduino IDE, unduh dan instal menggunakan petunjuk ini.
Anda memerlukan Perpustakaan Neopixel untuk membuat LED berfungsi.
Neopiksel suara-reaktif didasarkan pada sketsa Visualizer Musik LED Interaktif oleh Michael Bartlett di Sparkfun. Saya menggunakan "Full Visualizer" tanpa tombol, saya menambahkan sakelar rocker yang memiliki tiga fungsi:
LED tidak akan berfungsi kecuali sakelar terhubung.
Unduh sketsa LED Jukebox dari github.
Koneksi
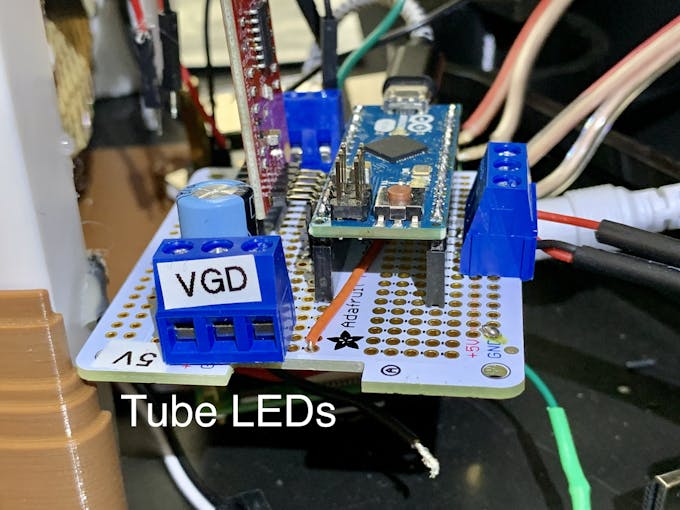
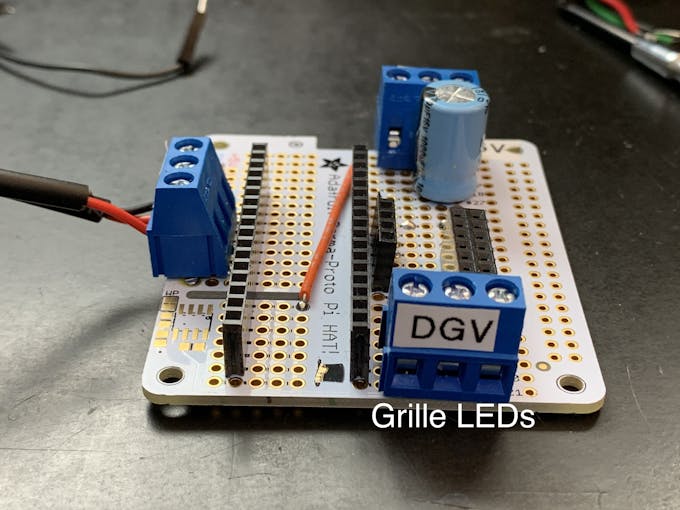
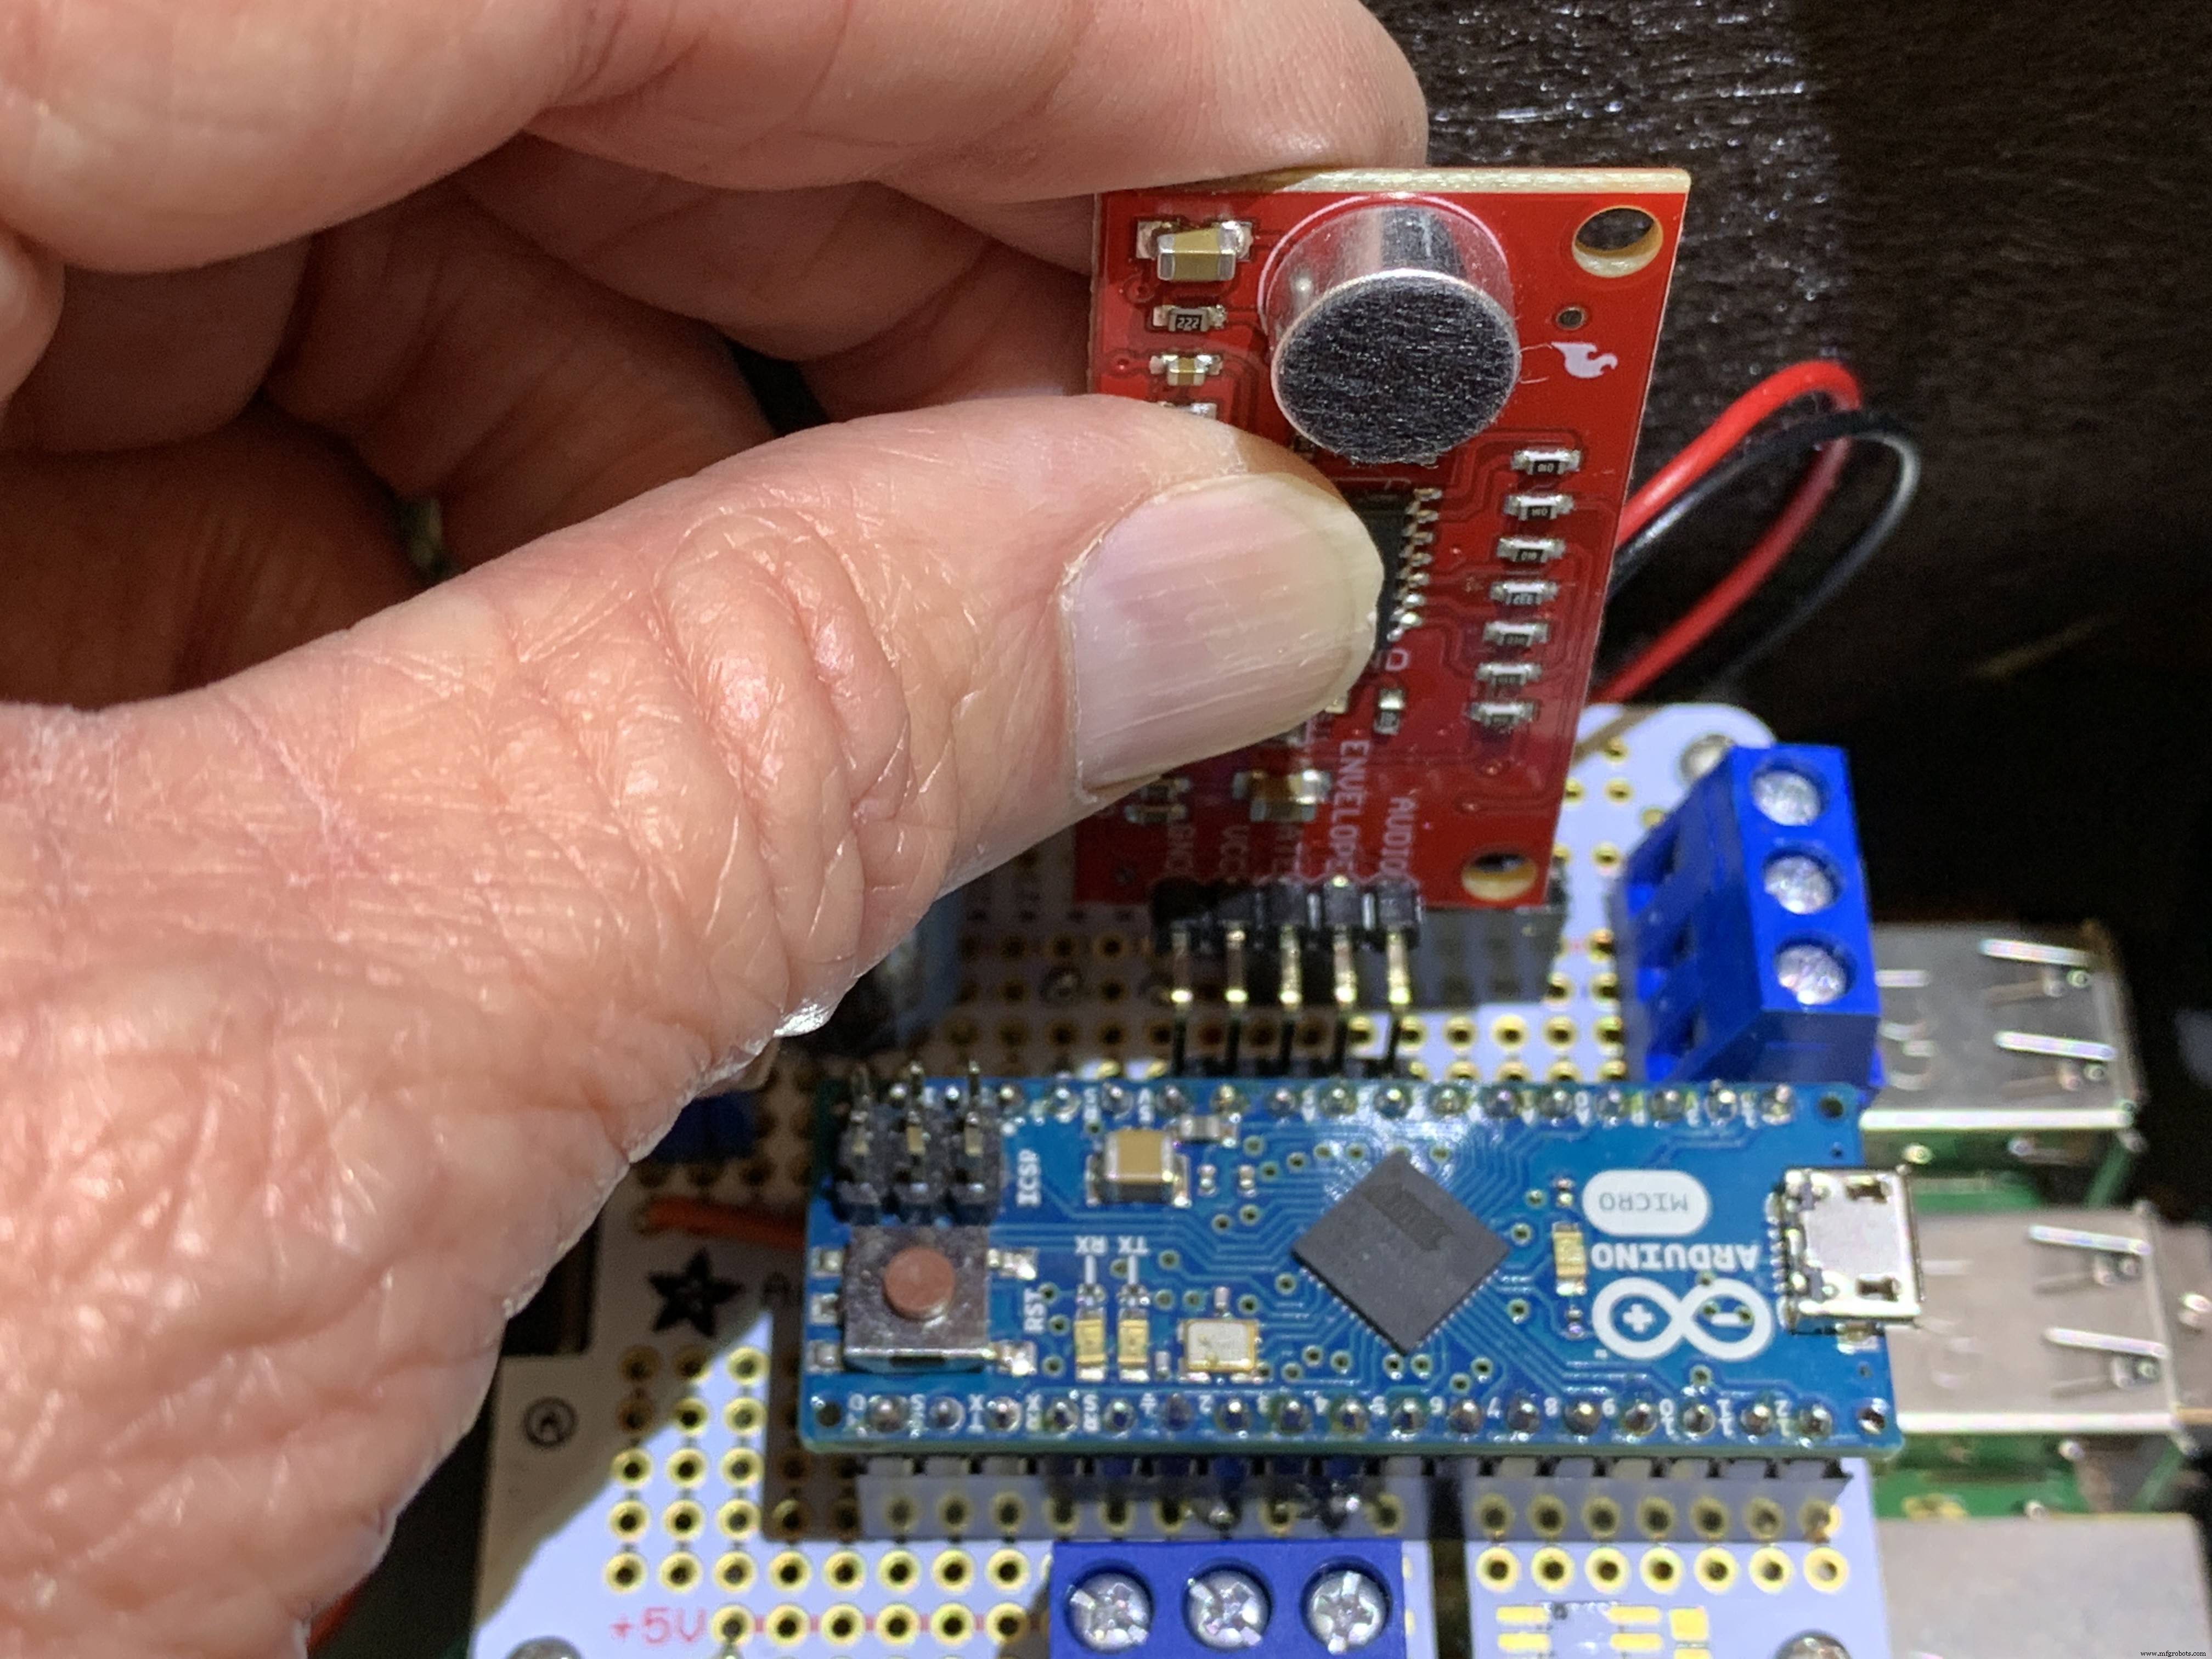
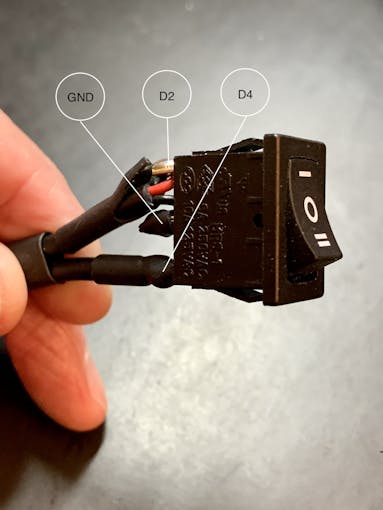
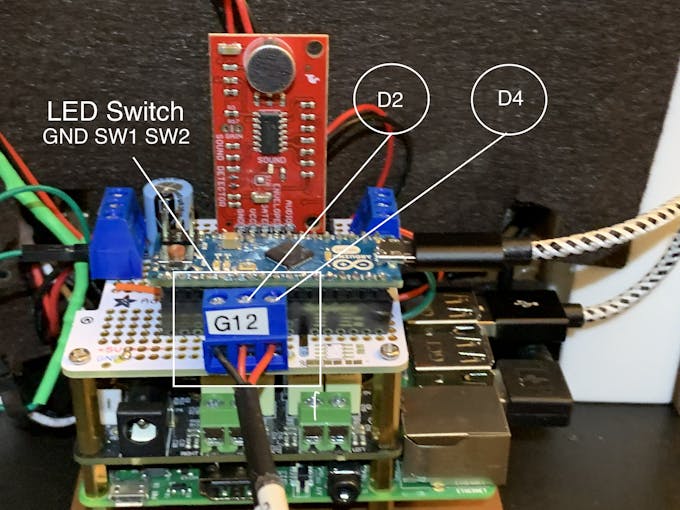
Unggah sketsa LED Jukebox ke papan Arduino Anda. LED kisi-kisi berjalan melalui rutinitas RainbowCycle dalam fungsi pengaturan sketsa, yang membutuhkan sedikit waktu. Jadi LED reaktif suara tidak akan langsung bekerja. Setelah fungsi penyetelan berjalan, LED kisi-kisi akan selalu menyala, tidak terpengaruh oleh posisi sakelar ayun. Dengan pemutaran musik dari Volumio, tabung Neon akan bereaksi terhadap musik dengan sakelar rocker 3 posisi disetel ke posisi satu. Beralih posisi dua melewati pola roda warna/pengejar melalui tabung Neon. Posisi tengah pada sakelar ini mematikan LED Neon.
Pencetakan 3D
Check the docs folder of the github download for part identification (Parts List) and Print Times for each part. There are also screenshots of the Prusa Slicer parameters and orientation to guide how to print each part. Find those in the 3D-Prints folder.
CATATAN: All images are of the prototype jukebox I built. These will look different from the published Fusion 360 design archive and STL files. The final release STL files include improvements for the following:
Perakitan
Tools
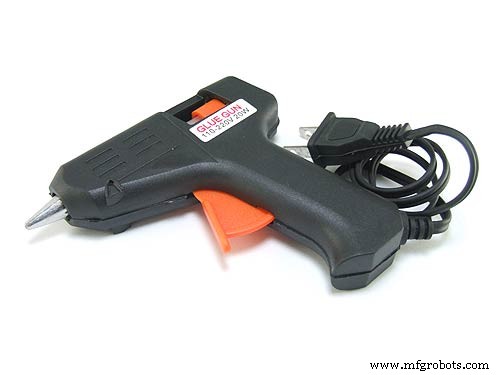
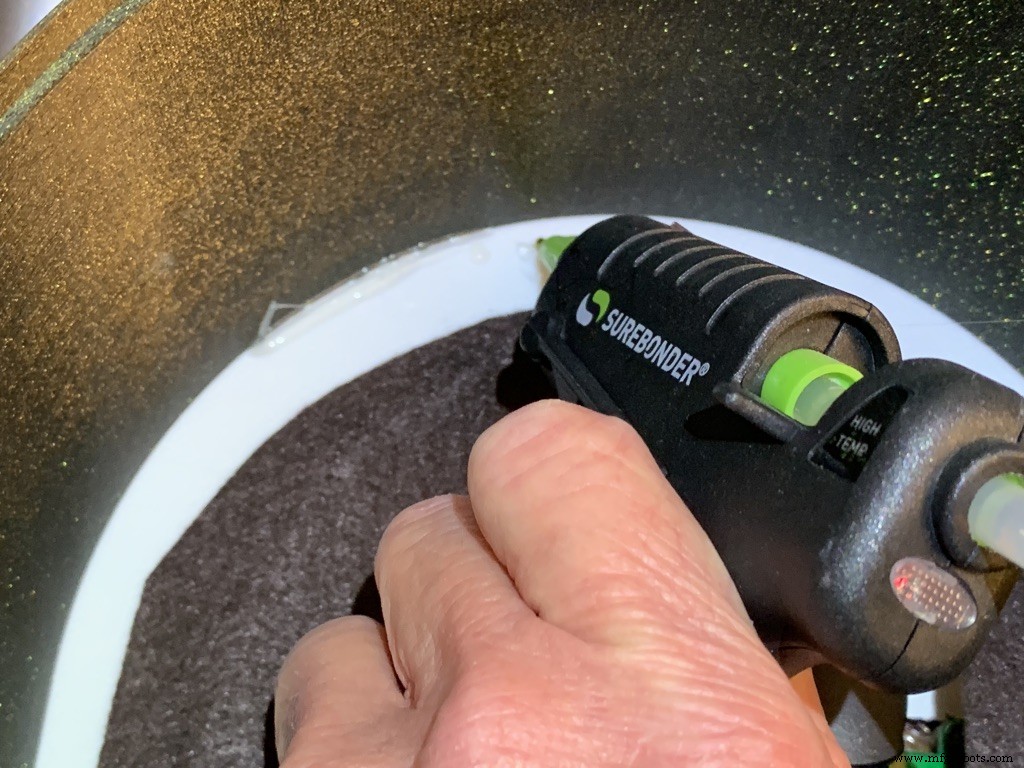
I used a fine-tipped hot glue gun so I could get into smaller spaces. These use smaller diameter glue sticks, and lots of them.
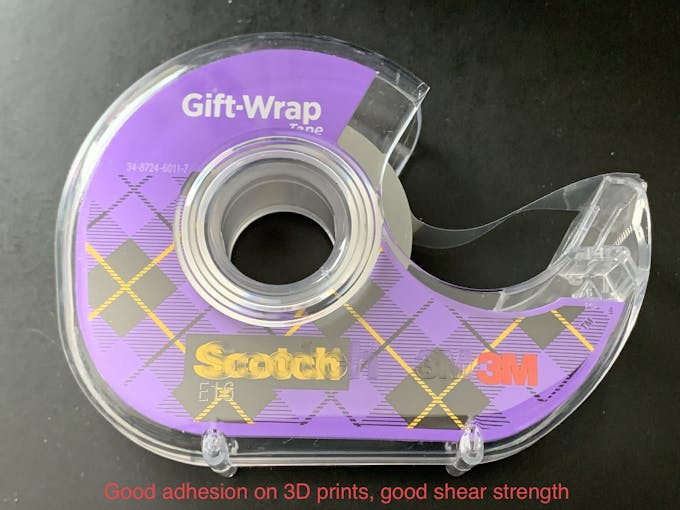
I used some tape I had on hand to temporarily hold the parts together for gluing. I found Scotch Gift-Wrap tape was actually pretty good for this. It has good adhesion and strong shear strength.
Enclosure
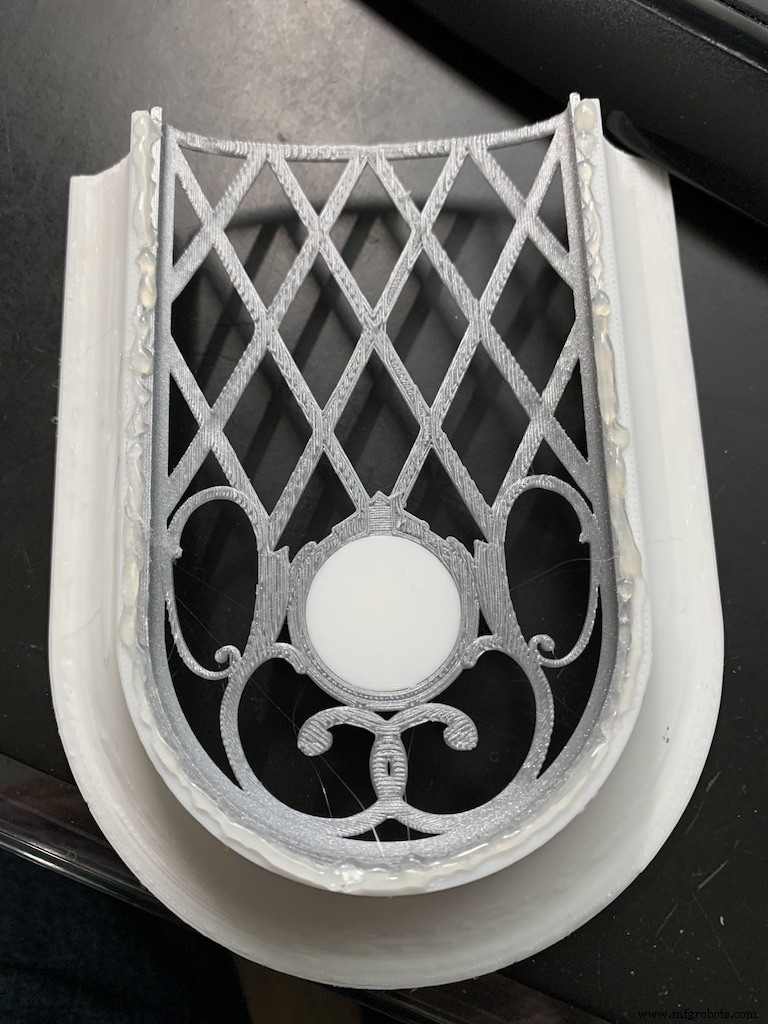
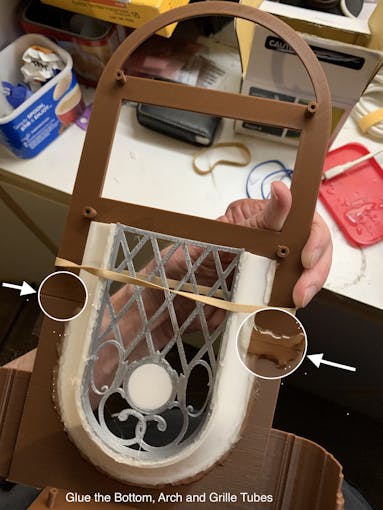
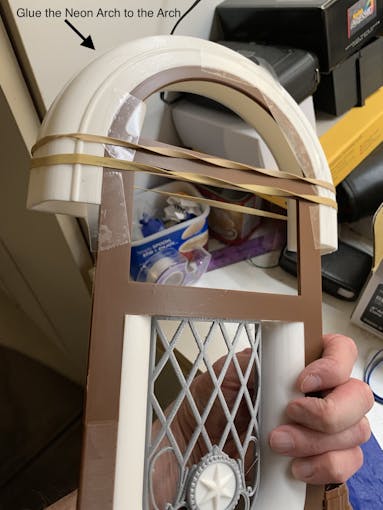
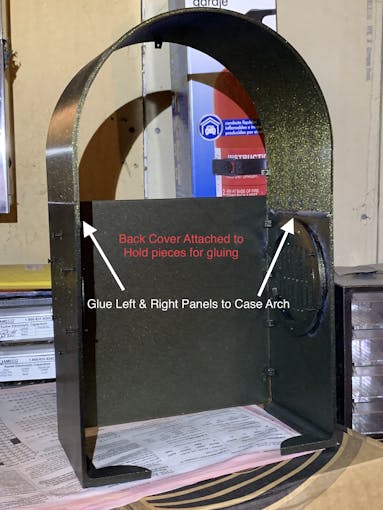
The parts are glued in starting from the inside, the Grille, and moving to the outside, the Neon Tubes, as shown in the video below.
Pause after gluing the Neon Tubes and mount the following hardware. This will give you more space to work in, before you glue in the back case. Refer to the Assembly Gallery photos below for details.
Then continue gluing the Case and Base to the other assembled parts.
After the case is fully assembled and glued together, mount the Speakers and add Decorations.
There is an optional two-piece 3D printed case cover that screws into the back of the case.
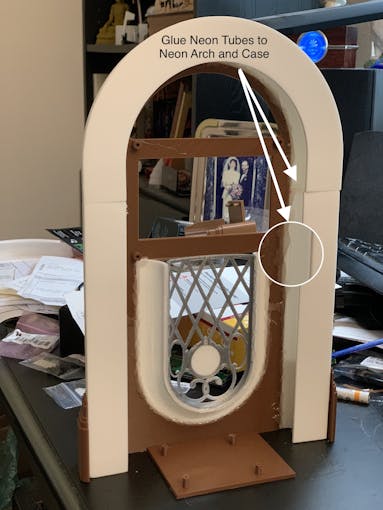
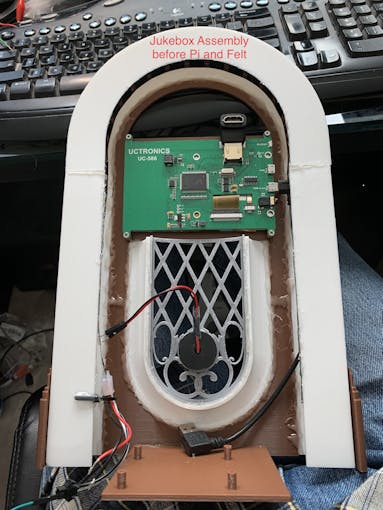
_k2oC39lKQk.jpeg?auto=compress%2Cformat&w=680&h=510&fit=max)
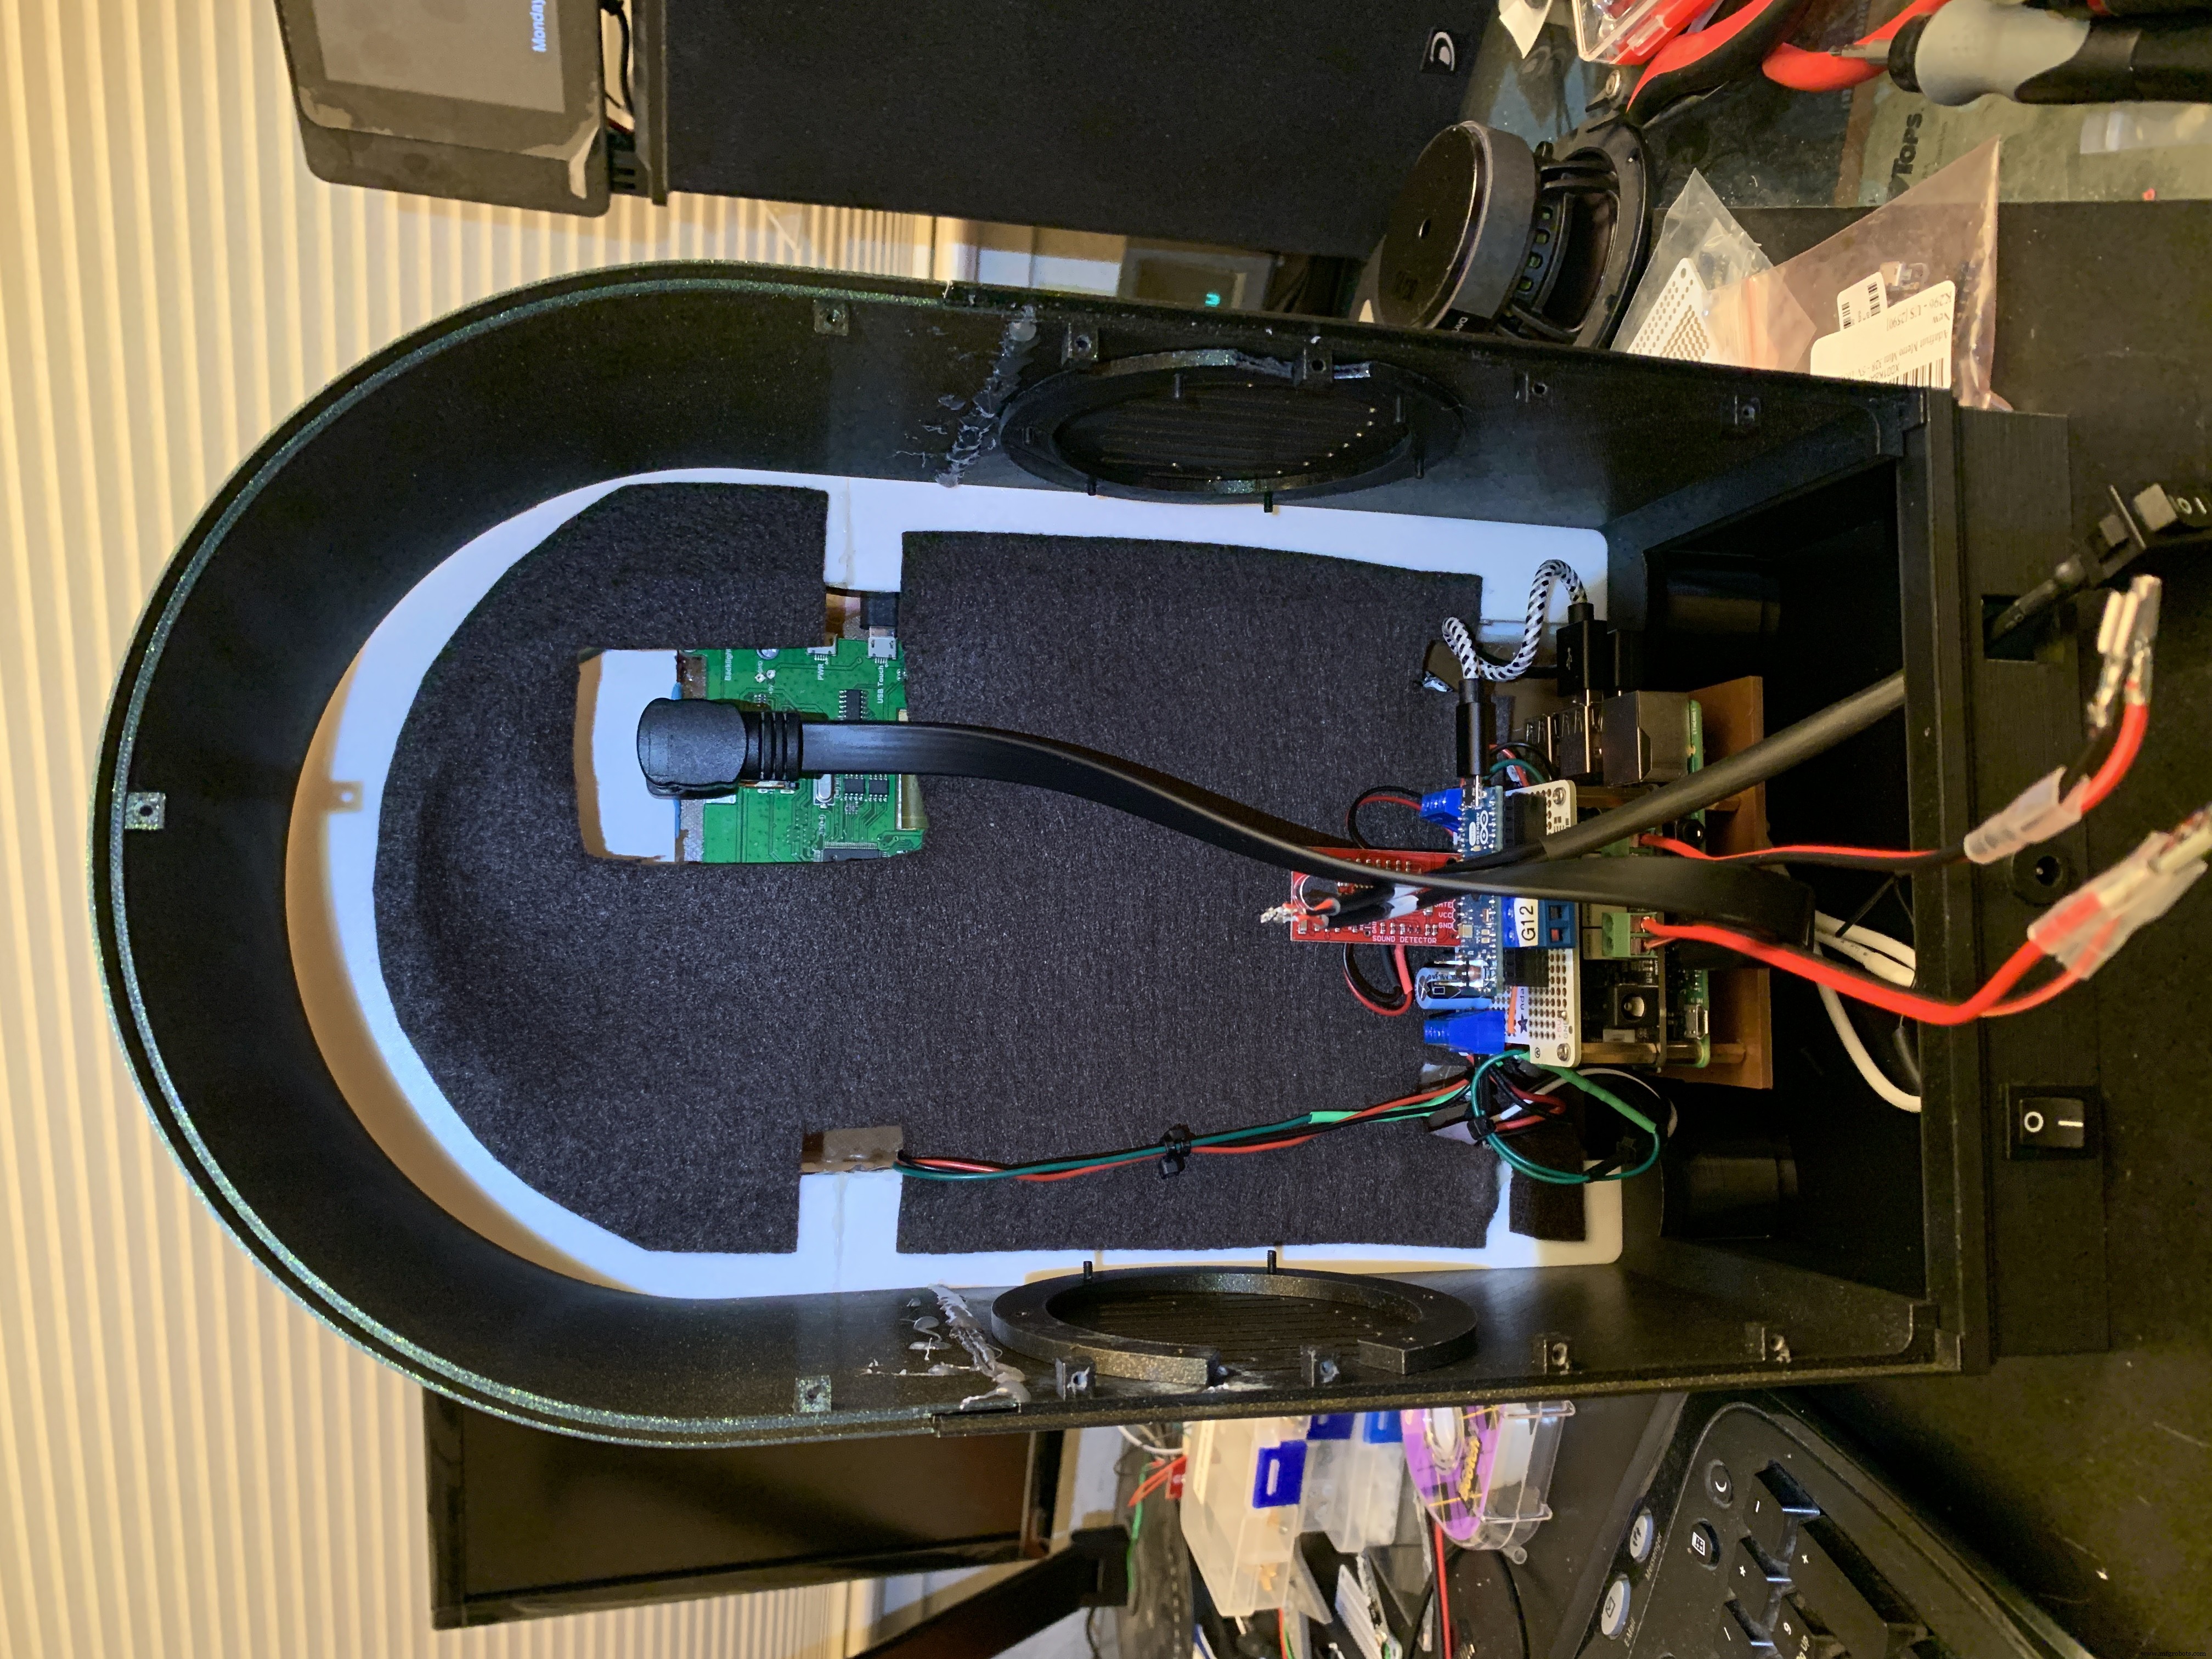
Mounting the Hardware
In the following, all the hardware mentioned is found in the "Things" section.
“Right” and “Left“ are your right and left as you face the front of the jukebox.
Acrylic Window and Photo
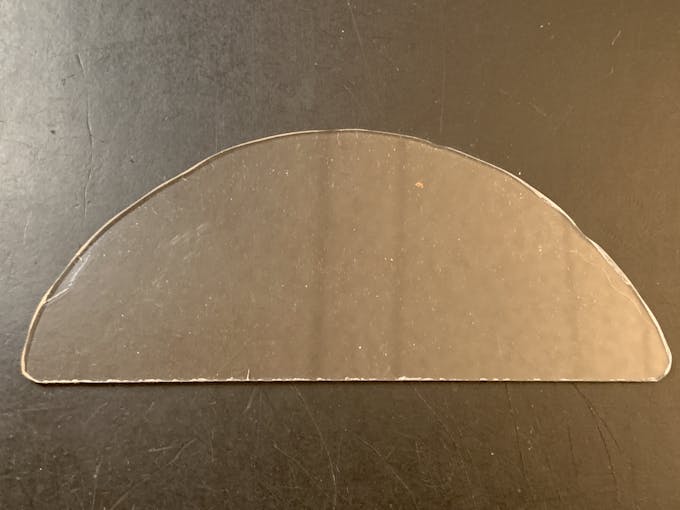
Use a rotary tool (eg., Dremel) at slow speed to cut a piece of clear acrylic. There is a template for this in the github download. Tape the template down on the acrylic and cut around the outside. Sand the edges and use CA to glue into the top of the Arch. Print a photo of your choice that will fill up the visible area and glue that in back of the acrylic.
NeoPixels
Glue the long LED strip edge-on to the Neon Tubes, so that the LEDs are facing inward to the Tubes. There is a small space between the LED and the edge of the strip that can help fit the string against the Neon Tubes. Align that to glue down.
The Grille Tube NeoPixels will be glued onto the Left and Right Bottom, with a "U" shape near the board mounting plate. Hold the strip down with pieces of tape and tack spots with hot glue. When those are solid, remove the tape and fill in the spots where the tape was with more glue.
LCD Touch Screen
Screw the Touch Screen into the mounting posts at the top of the Arch, below the Acrylic window. The HDMI Touch Screen input is on the top of the screen. You need to insert a 90 degree to 270 degree HDMI adapter there, Plug the HDMI 1 ft. Male-to-Male flat cable into the adapter. The other end plugs into a Raspberry Pi 3. (If you're using a Raspberry Pi 4, you need a different cable that has a Micro HDMI in one end). Insert the Left-angle Micro USB to the Touch port on the LCD, and the USB-A end to a Raspberry Pi port. Thread this cable through the left Neon Tube.
Grille Cloth and Star Light Holder
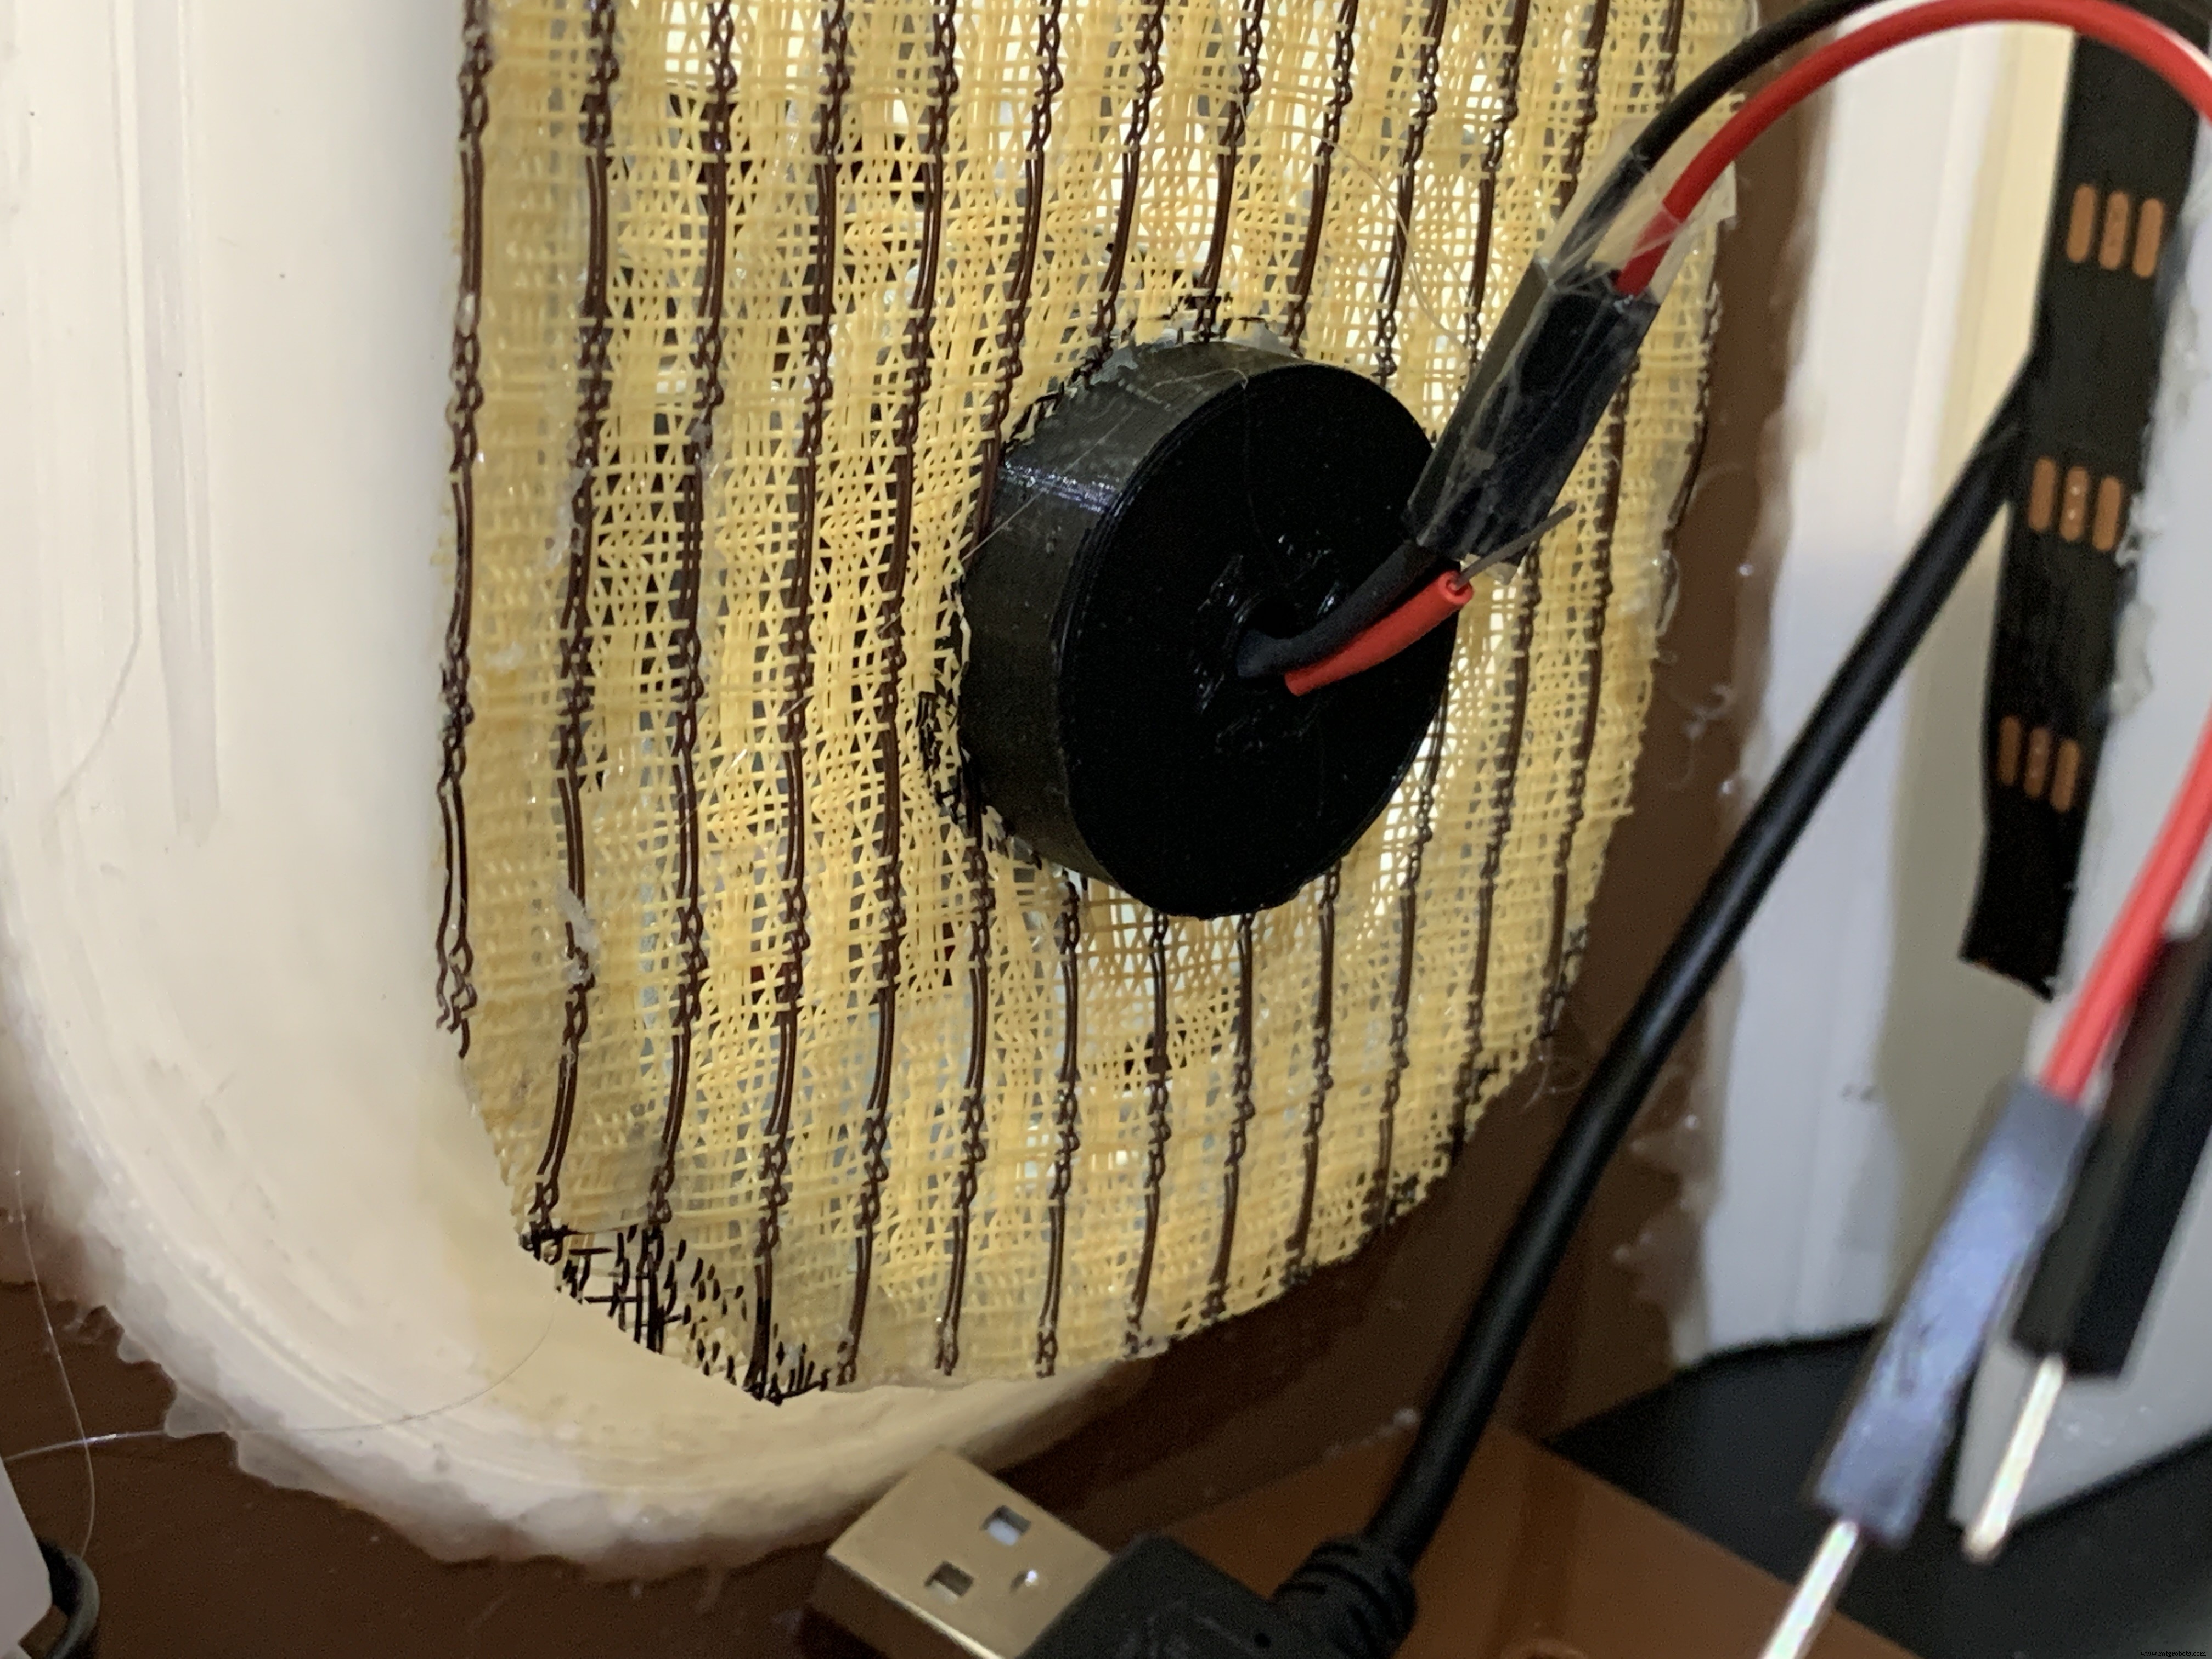
The Grille will be backed with "speaker cloth" to hide the inside of the jukebox. There will be an LED holder behind the Star Light to prevent light bleed, and a hole needs to be cut into the cloth for that.
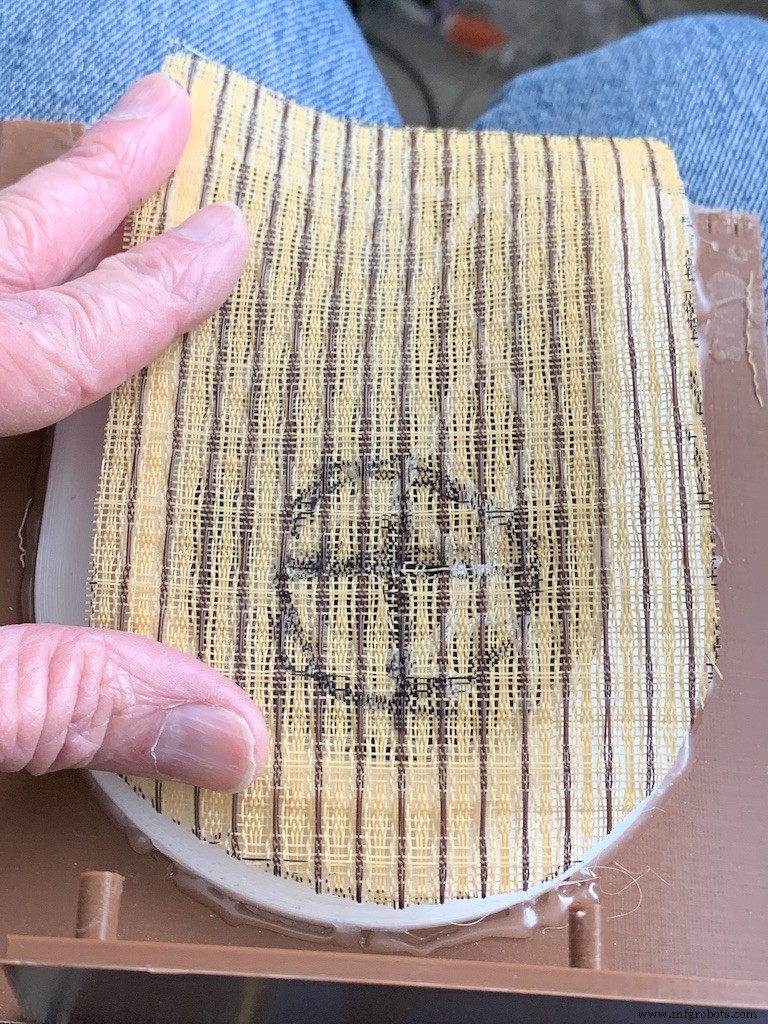
Cut a piece of speaker cloth large enough to cover the Grille and the edges of the Grille tubes. Use the Star Light LED 3D printed holder as a guide and mark the speaker cloth in a circle for the outside of the holder. Mark a cross in the center of the circle Cut the two lines of the cross to make 4 sections. Cut the rounded part of each section to make a hole for the LED holder.
Mount the color-changing LED mentioned in the section Prepare the Circuit Board/Star Light, above. Insert the LED into the holder and glue it to the Star Light. CA will work well here.
With the LED holder glued in place, fit the speaker cloth over the holder and the Grille. Stretch and glue the edges of the cloth to the Grille Tubes.
Raspberry Pi/IQAudio Pi Digi Amp/Arduino
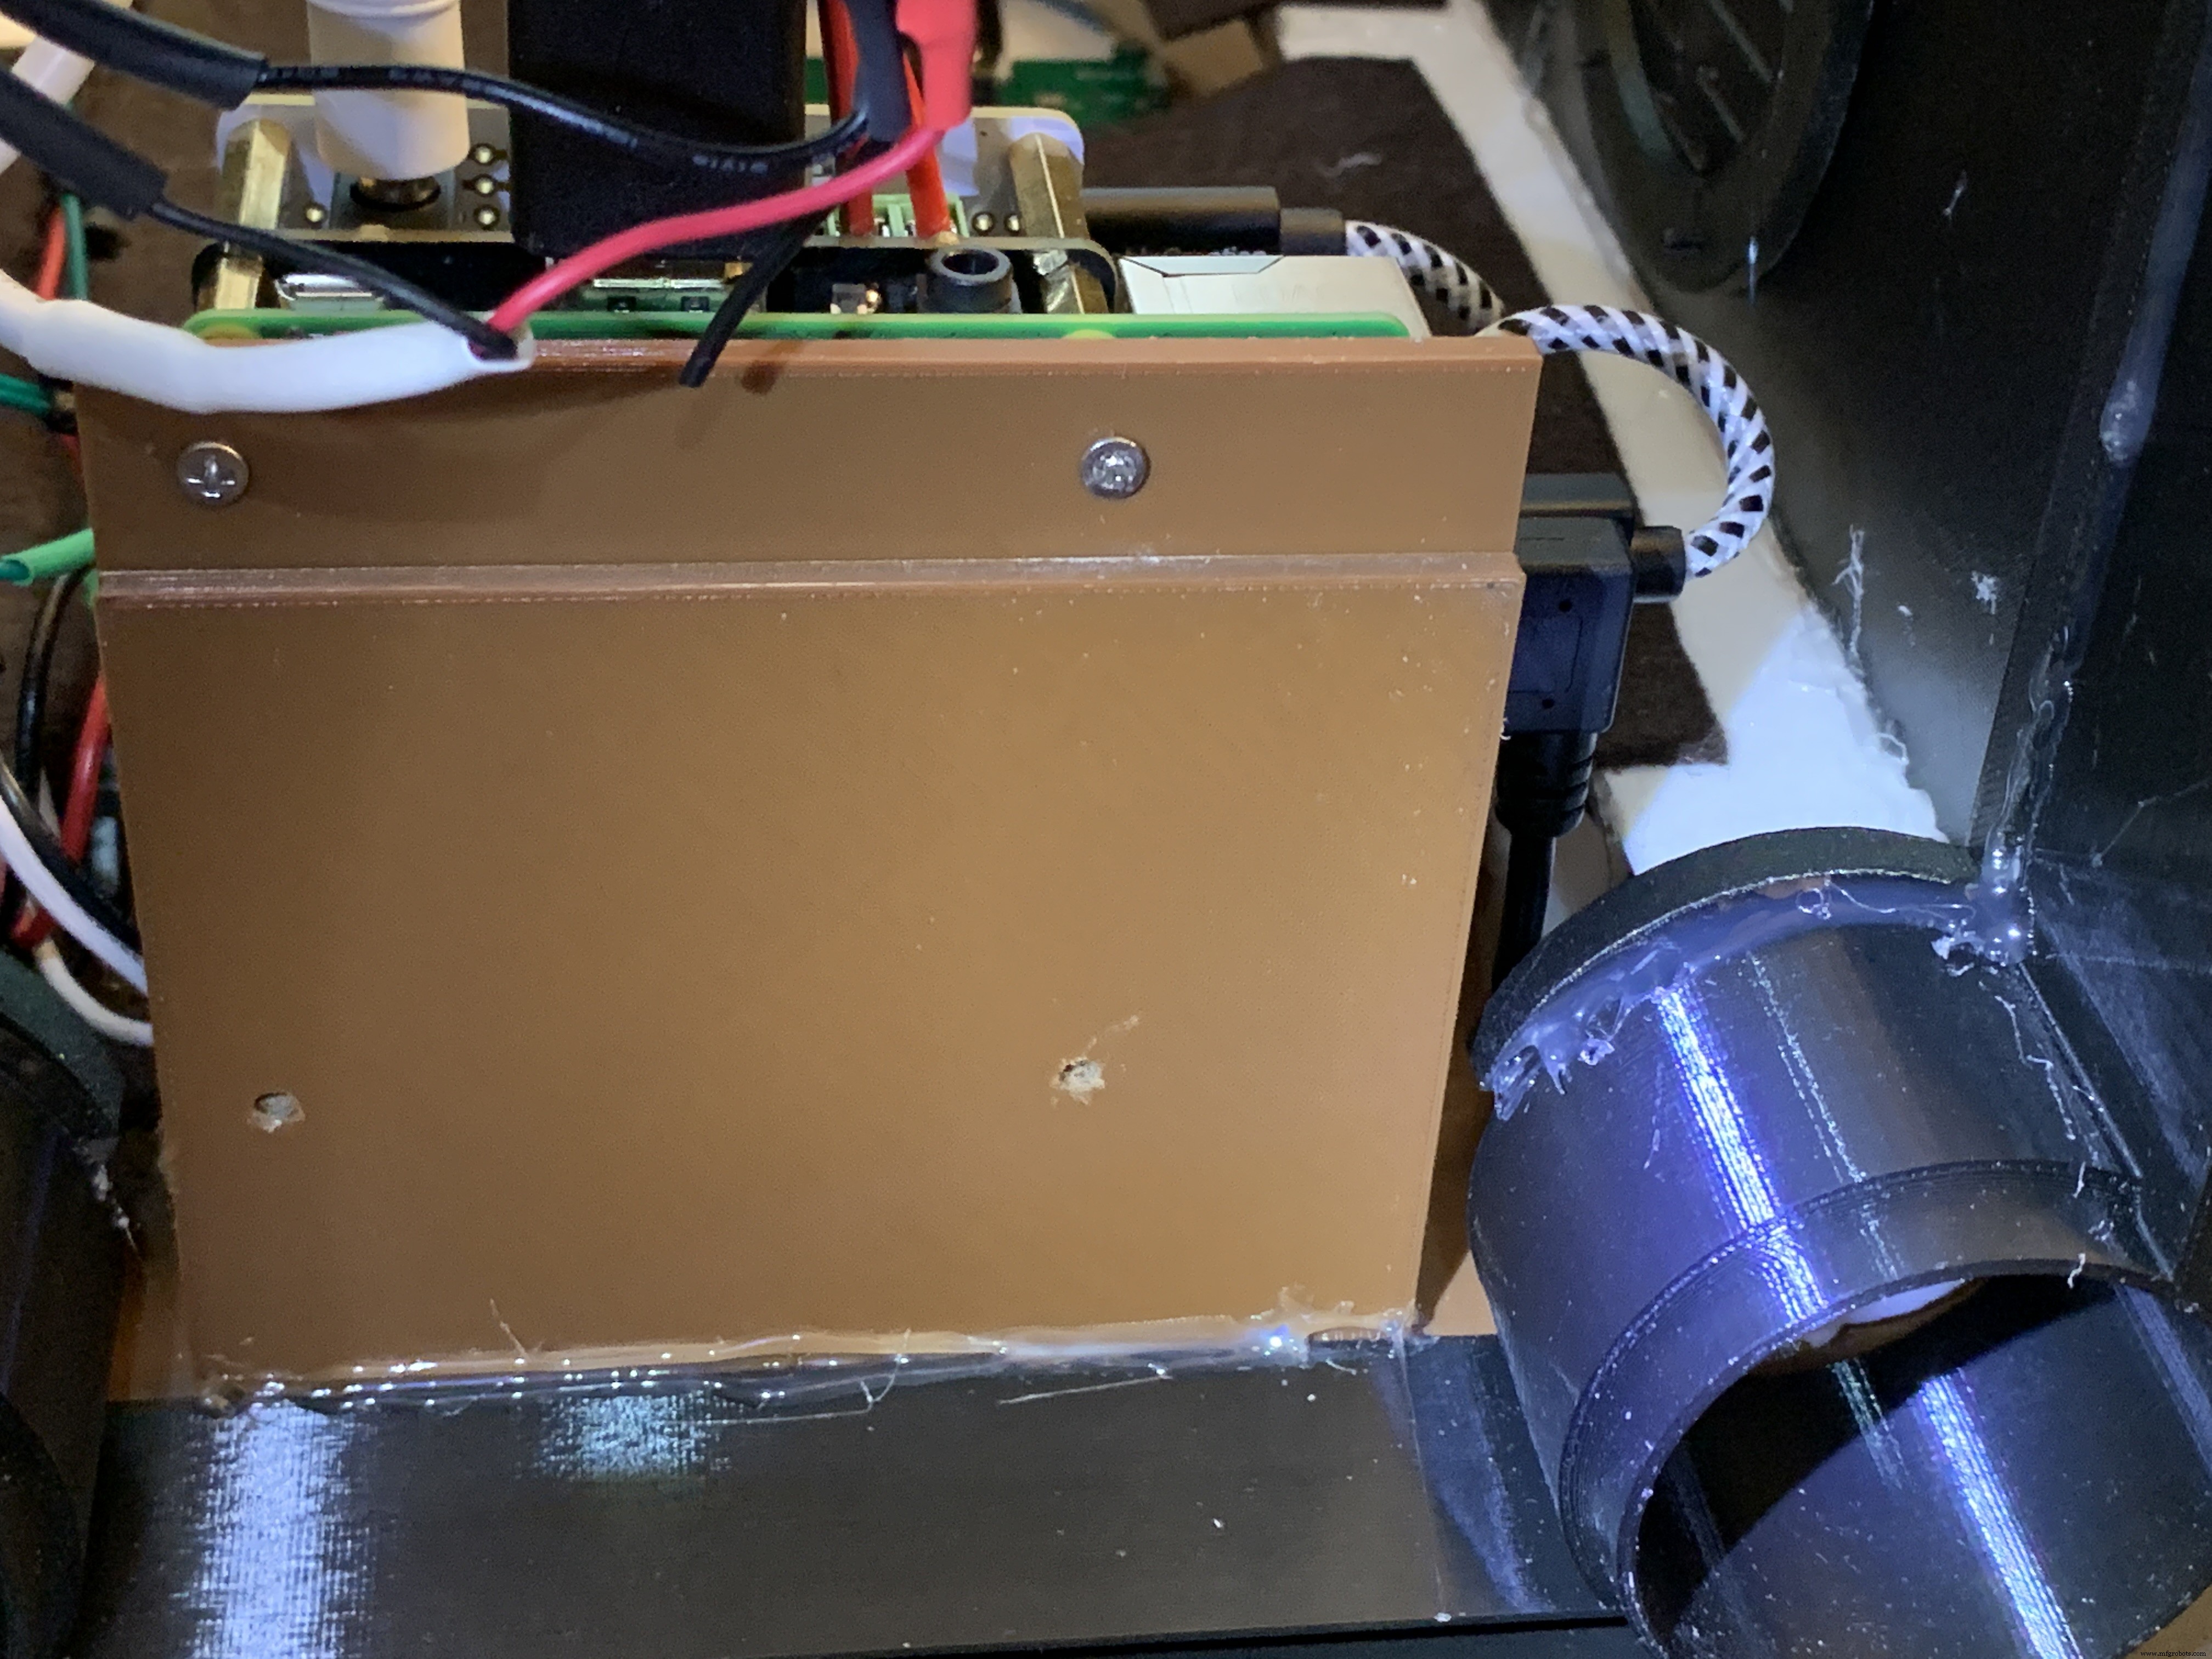
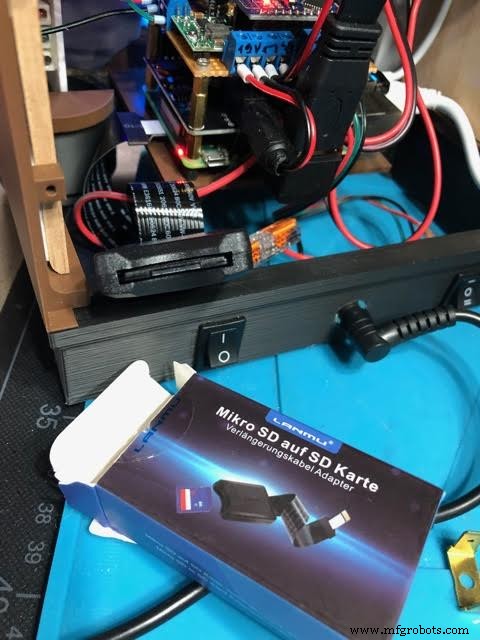
Mount the Pi and other boards (you assembled and tested it in Getting Started, Right ?) onto the mounting plate with screws into the Pi's 5mm bottom standoffs. Plug the LCD HDMI and USB cables into the mounted Pi. There's an additional 6 inch Micro USB to Micro A cable. Plug the Micro end into the Arduino and the other end into the Pi to power the Arduino.
The Star Light +5V and GND plug into the power from the Digi Amp Plus +5V/GND rails.
Adhesive Felt
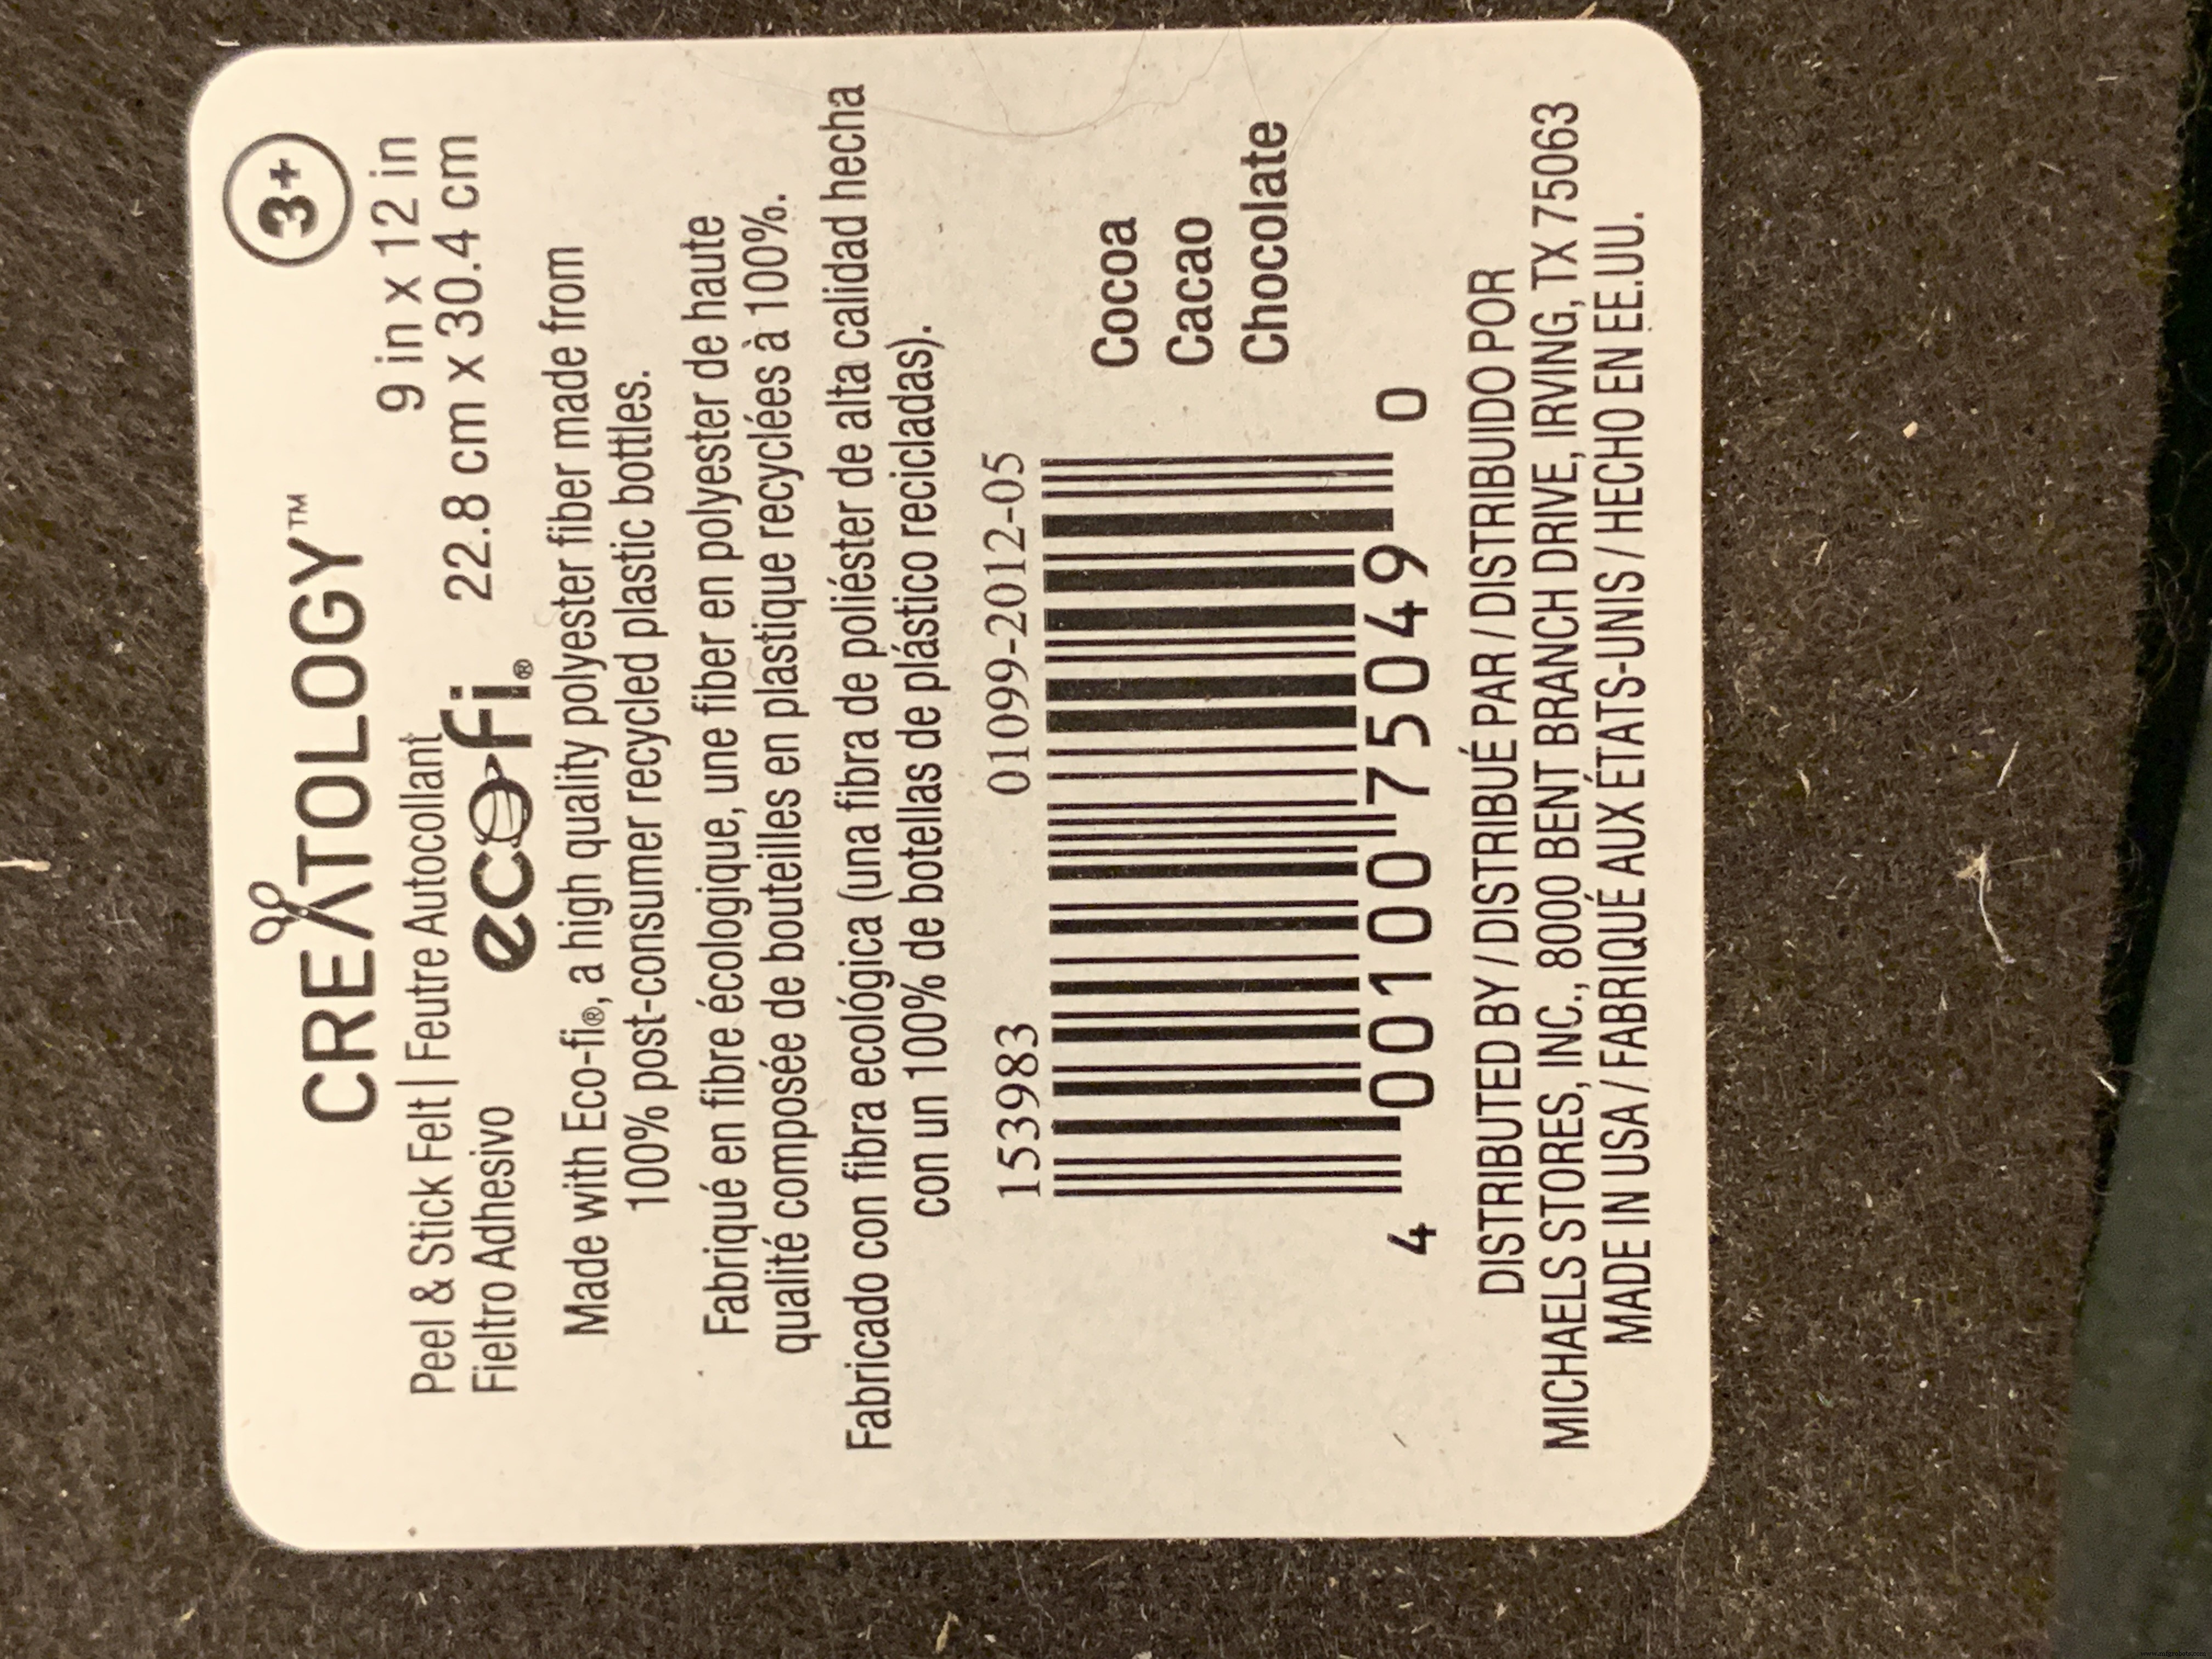
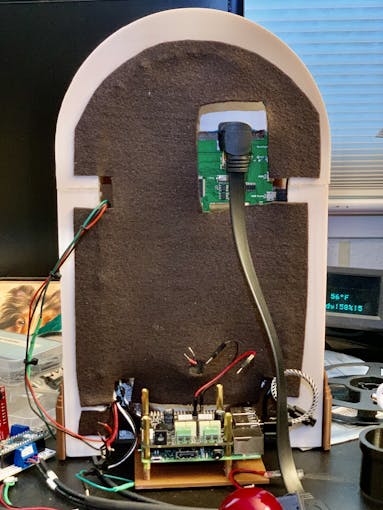
To prevent light bleed, cover the inside with craft felt, which has its own adhesive backing Test fit the felt and cut holes to allow for cables and wires to pass through.
Base with Switches
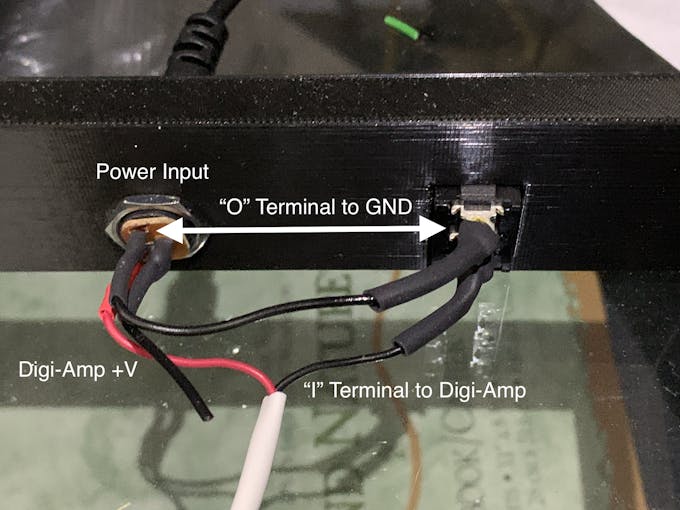
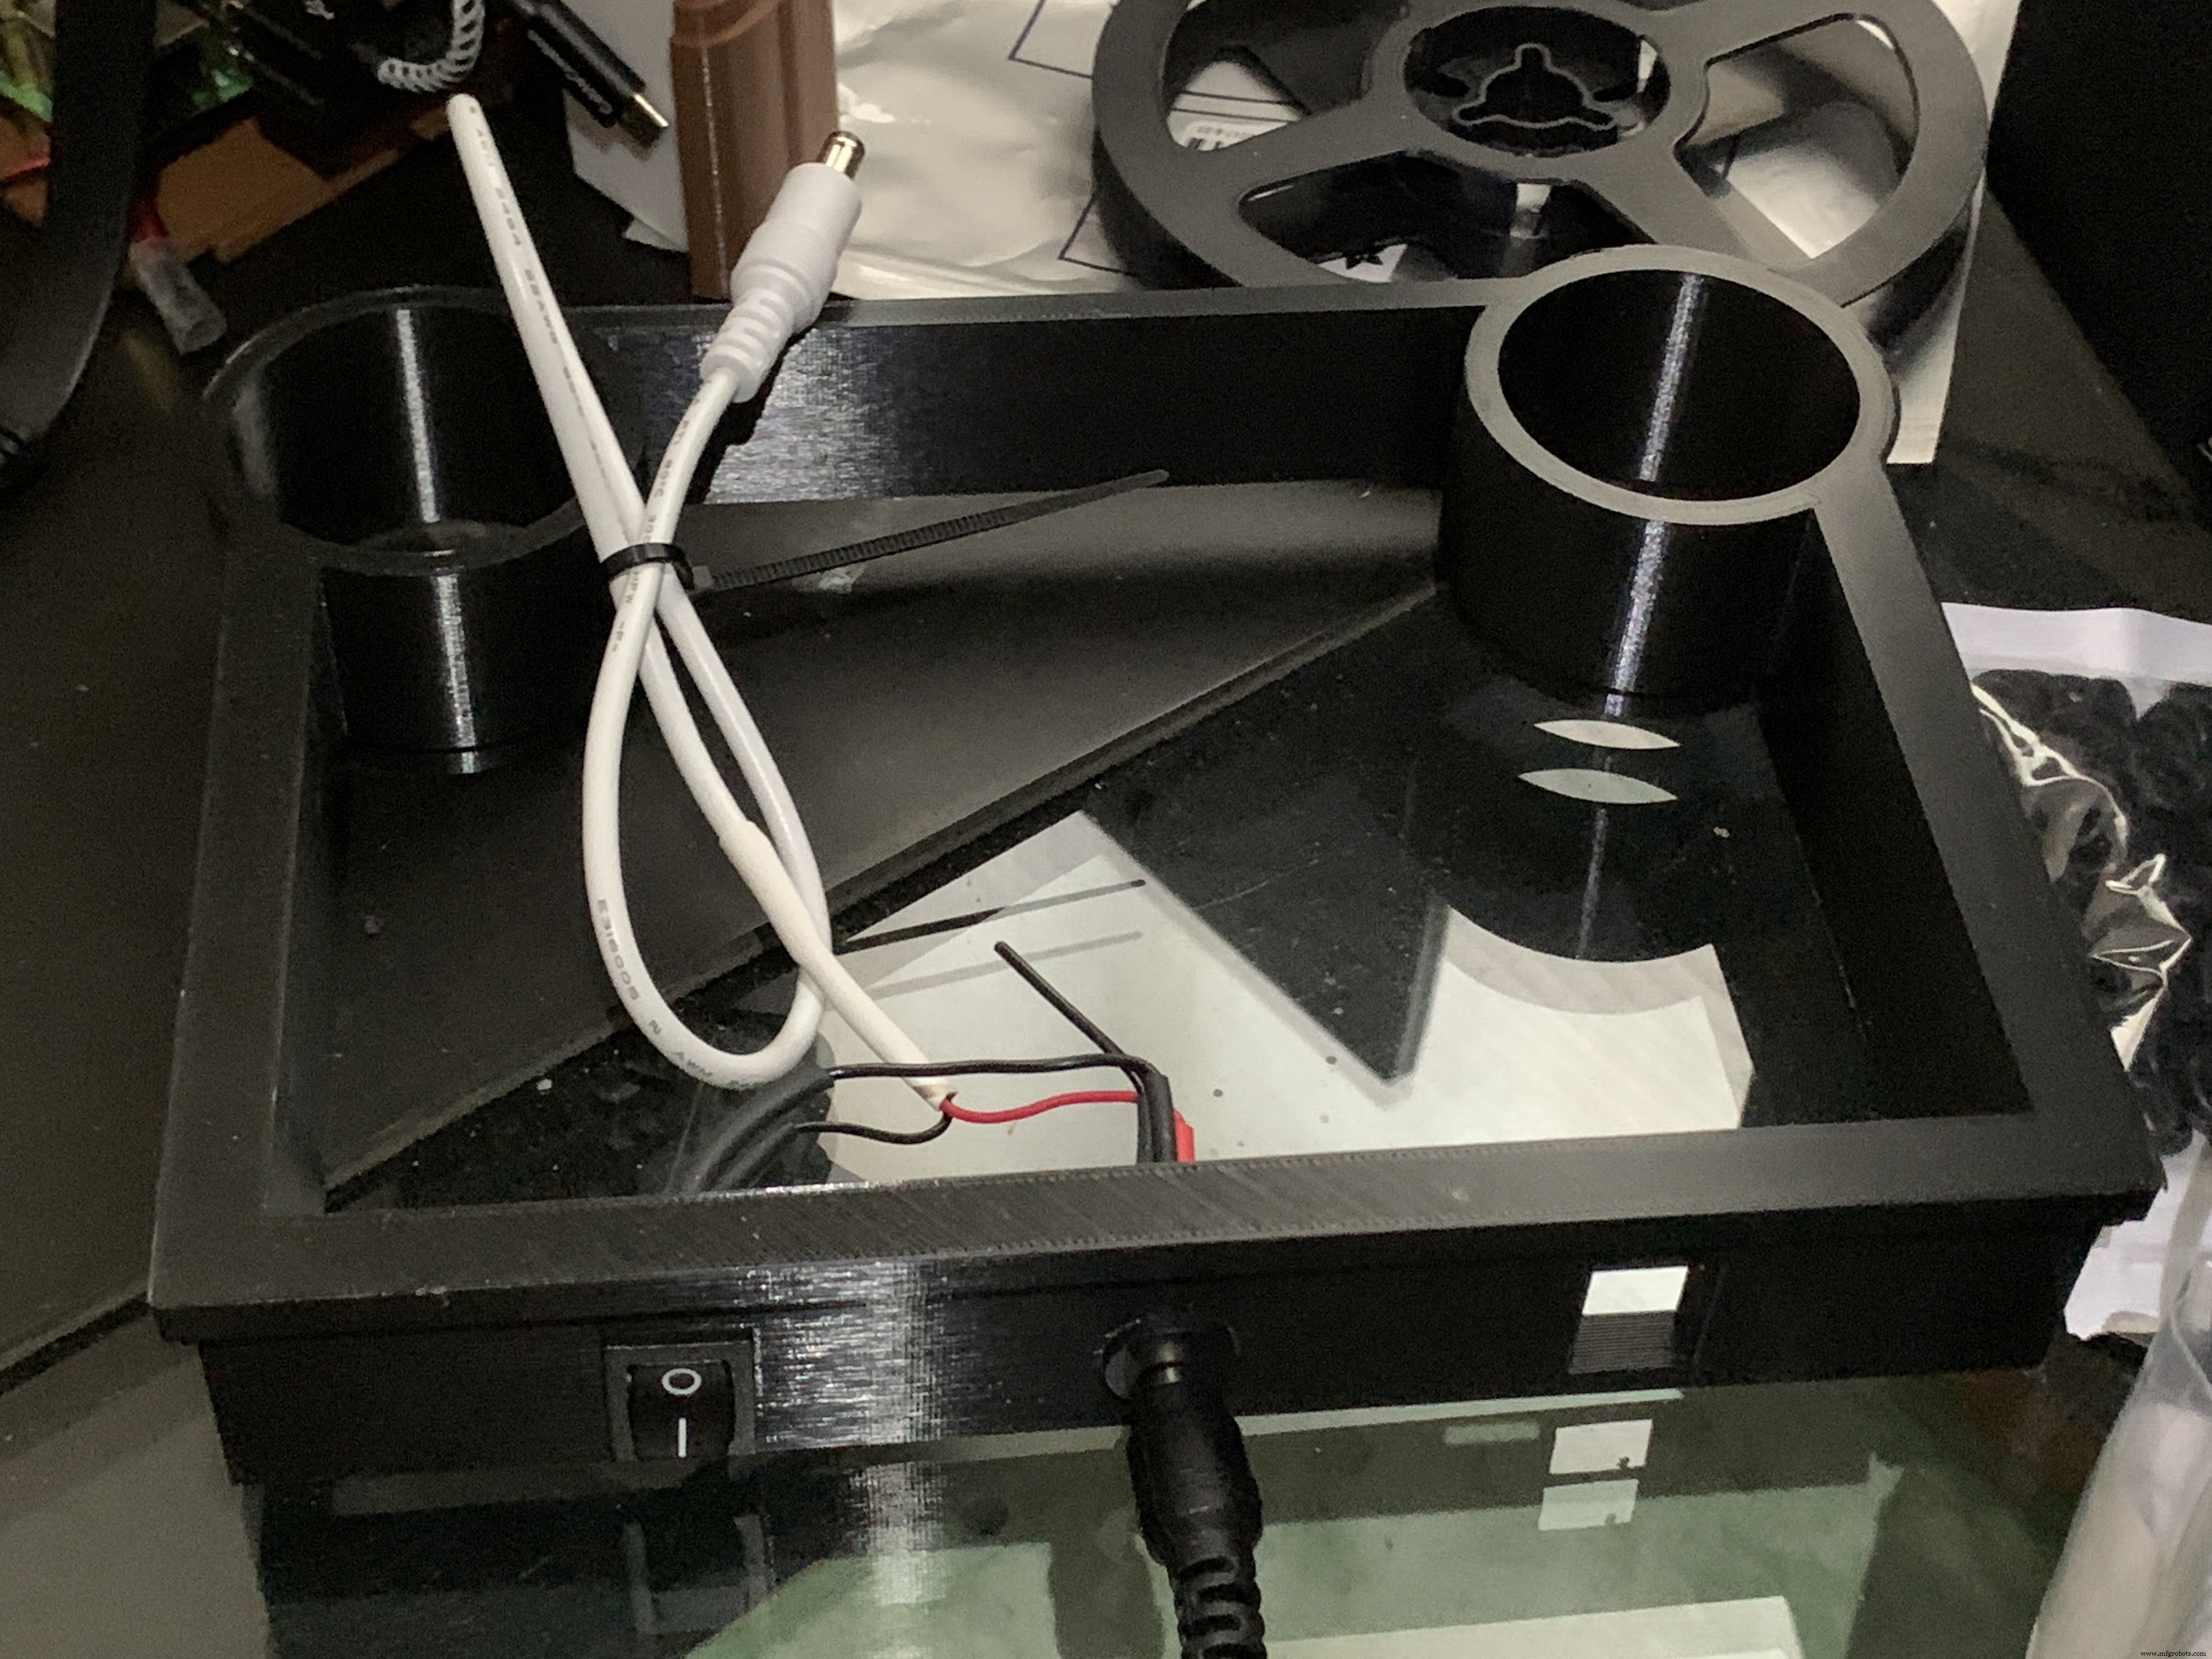
In addition to the Animation Selector Switch, there is an on-off rocker switch that is connected to a panel-mount jack.
Cut one GND (black) wire at least 80 mm long for this switch. Strip the insulating jacket off the power extension cable (white) in pictures about 80 mm long to expose a red and a black wire. Insert the barrel power connector and the on-off rocker switch into the base.
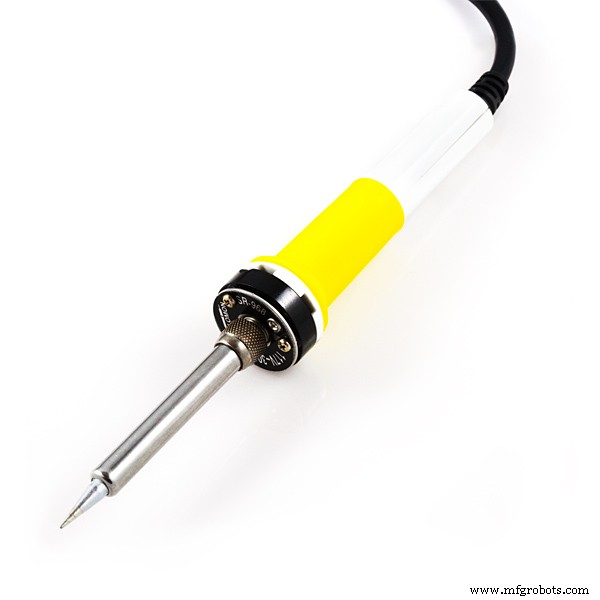
Solder the cut black wire to the terminal marked "O" on one end, the other end to the active GND pin on the barrel power connector. The other terminal "I" is soldered to the GND (black) of the power extension cable for the Digi Amp Plus Finally, the +V (red) of the power extension cable is soldered to the +V terminal of the barrel connector.
Plug the extension connector into the Pi Digi Amp Plus. Glue the Base onto the Bottom and Case.
Speakers
The Dayton Audio RS100-8 speakers have a cone in the middle that prevents them from being mounted flush to a solid grille, as on this jukebox. If you're using these speakers (or some where the center protrudes), you'll have to use a mounting ring (3D file supplied) so the speakers can mount properly.
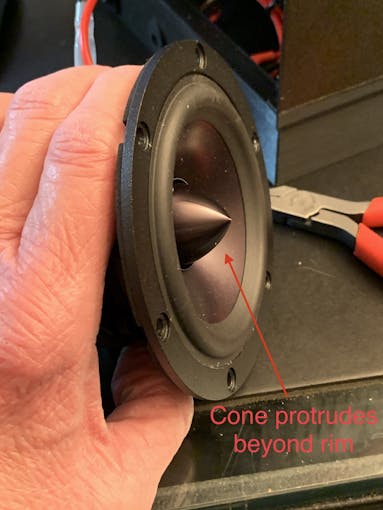
For the last step of assembly, screw the speakers in with 15 mm M2.5 metal screws and nuts.
Tip: To make assembly easier, mount the speaker rings to the case with the screws pushed in for alignment in the holes. Tack down with hot glue or CA glue. When solid, mount the speakers to the rings.
I had pretty good luck holding the tiny nuts down with my index finger and turning the screw to get the nuts started.
However, there is one screw hole straight back on each side that has very little clearance. It is hard to get the nut started on that screw. Putting blu-tack or tape on the nut may help position it to get it started.
Eventually, I did get all the nuts fastened.
Decorations
There are decorations on top and the two sides of the jukebox, with details in the github 3D Parts List document:
Repeat for Left &Right:
For the Neon Tubes, use a small ruler to mark the halfway point on the side of the Red Cover with a pencil. Then, match that to the Neon Tube joints and glue with CA.
The long Case Joint Cover aligns to the Neon Tube Red Cover and glues down to the case.
Gllue the Fan Decoration and Ornament at the top and bottom of the Red Cover
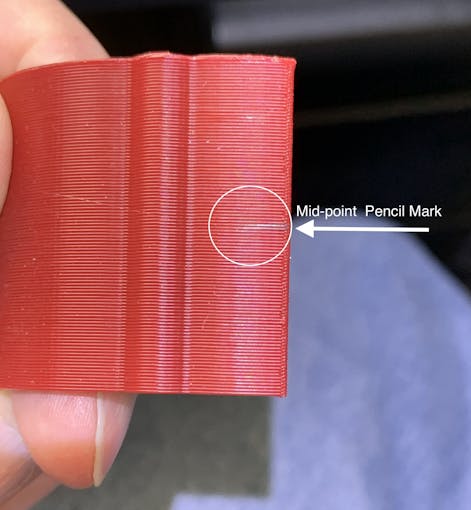
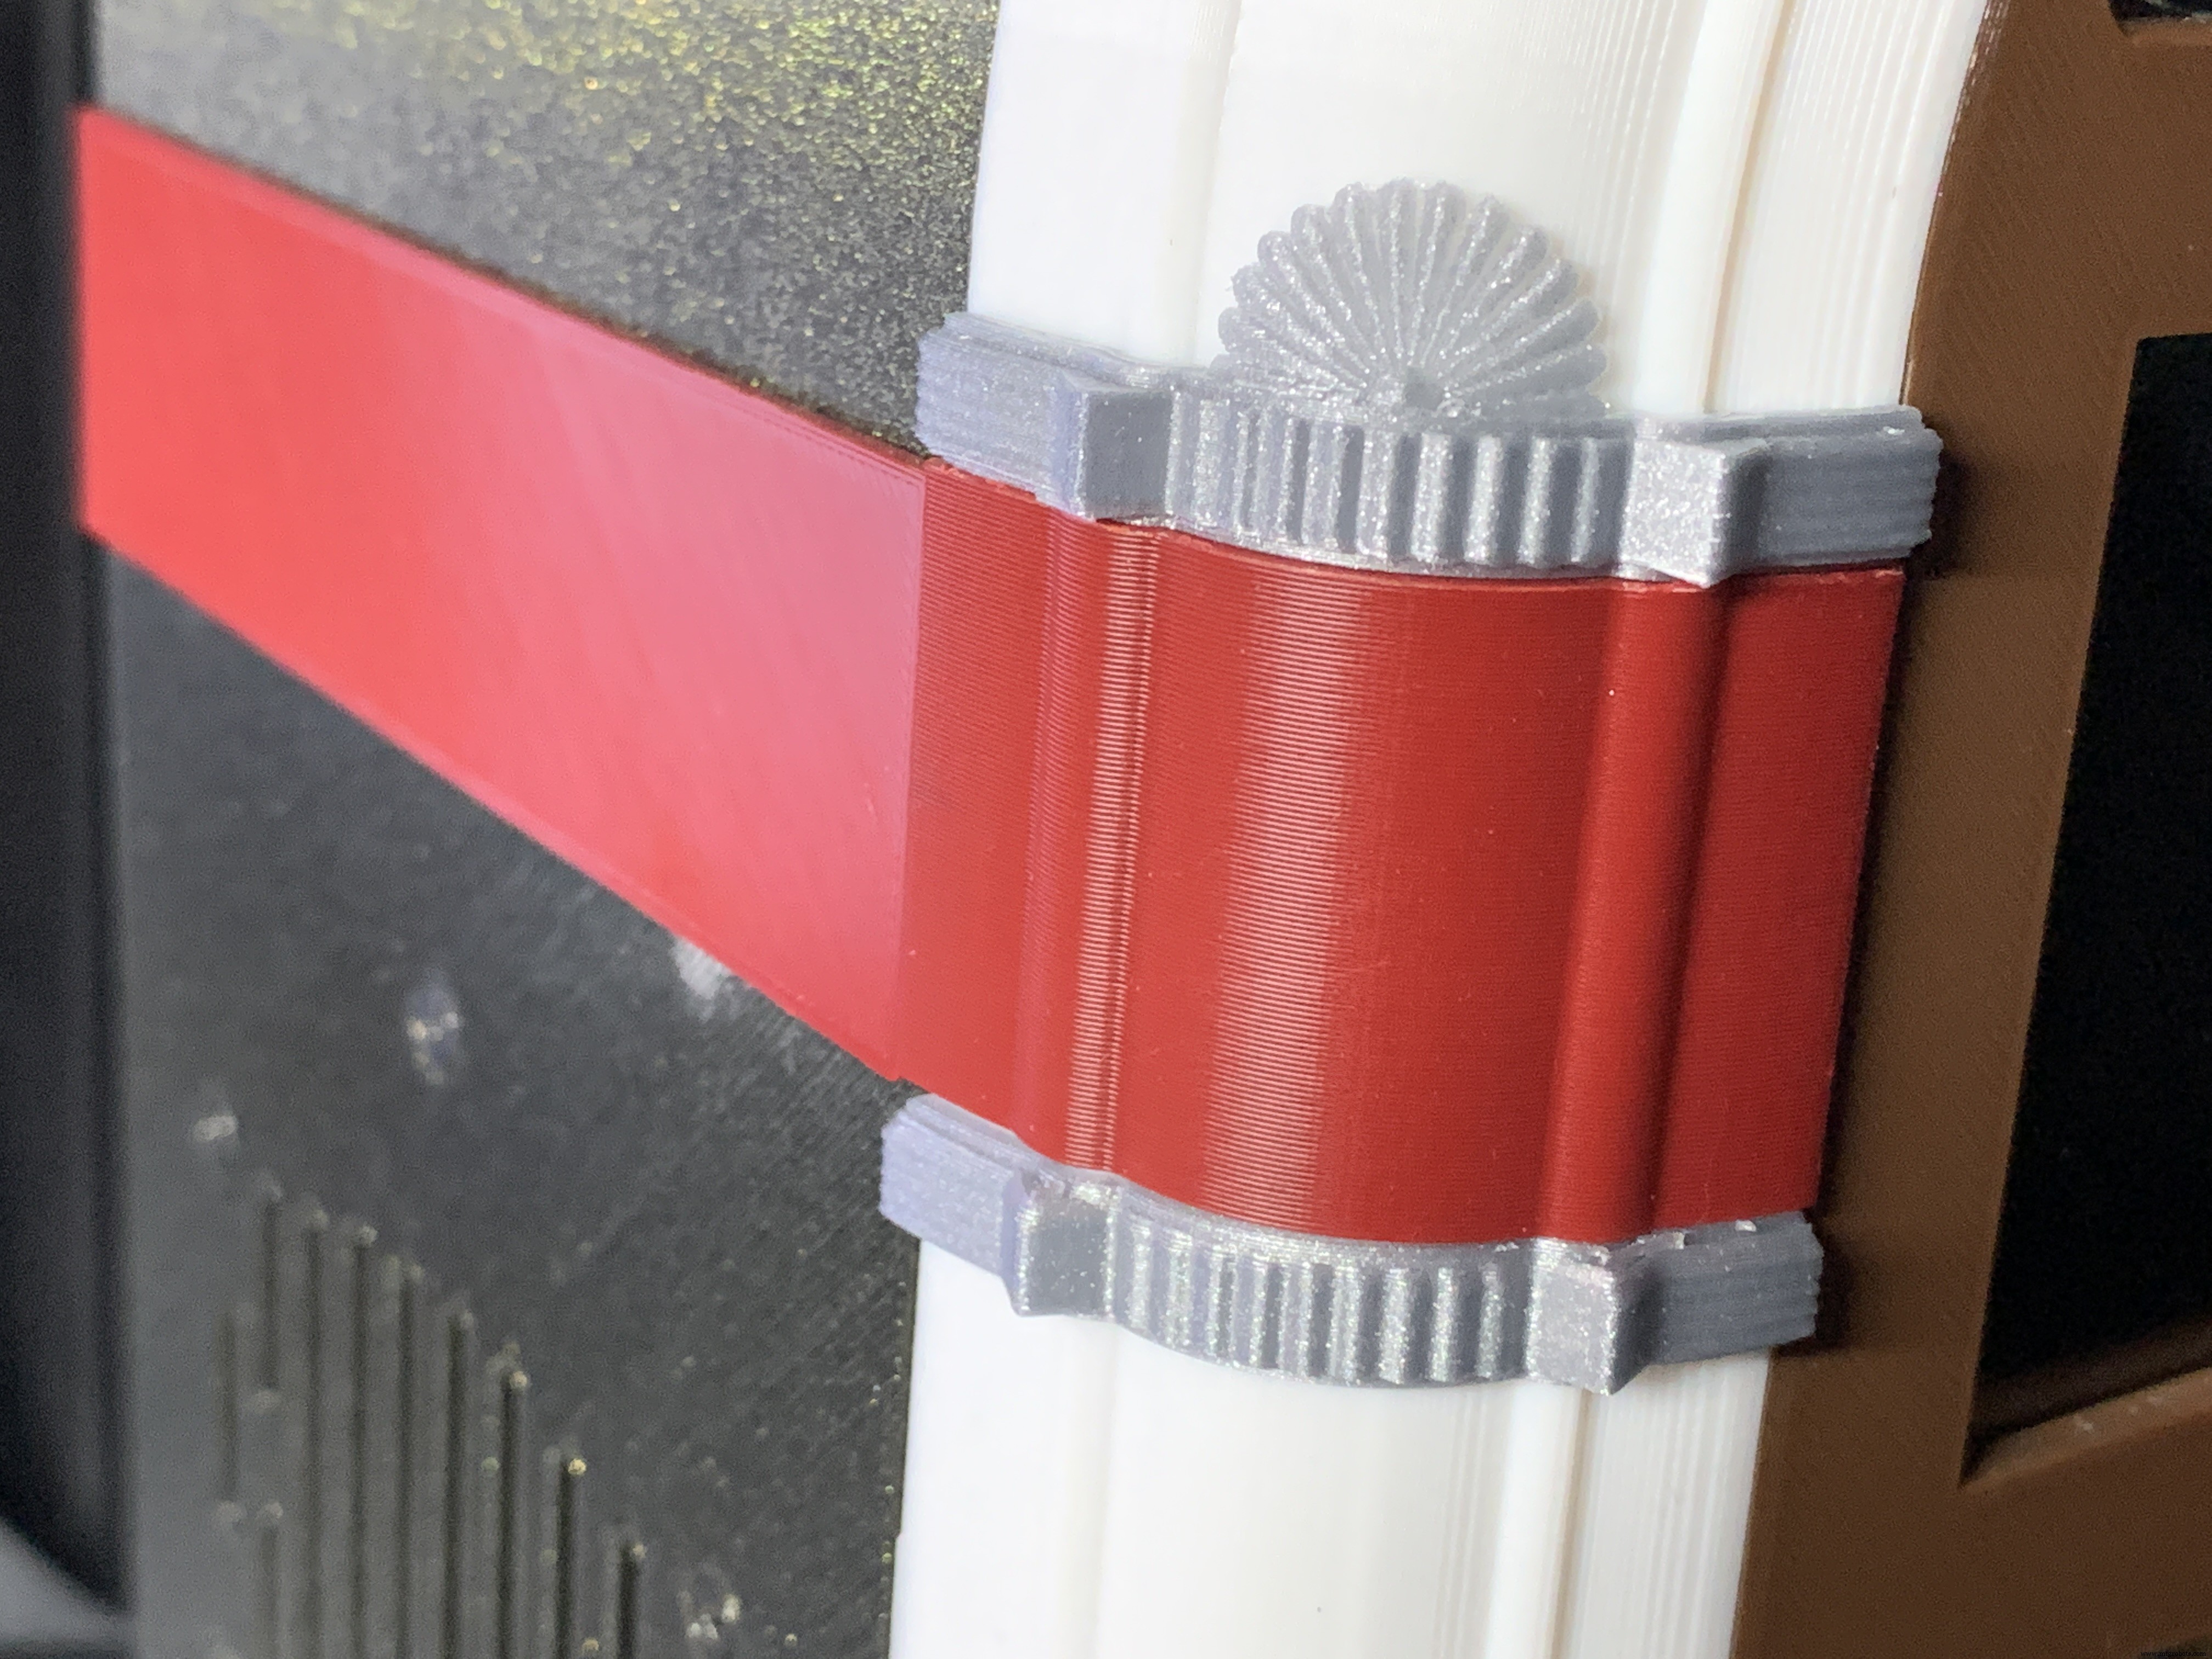
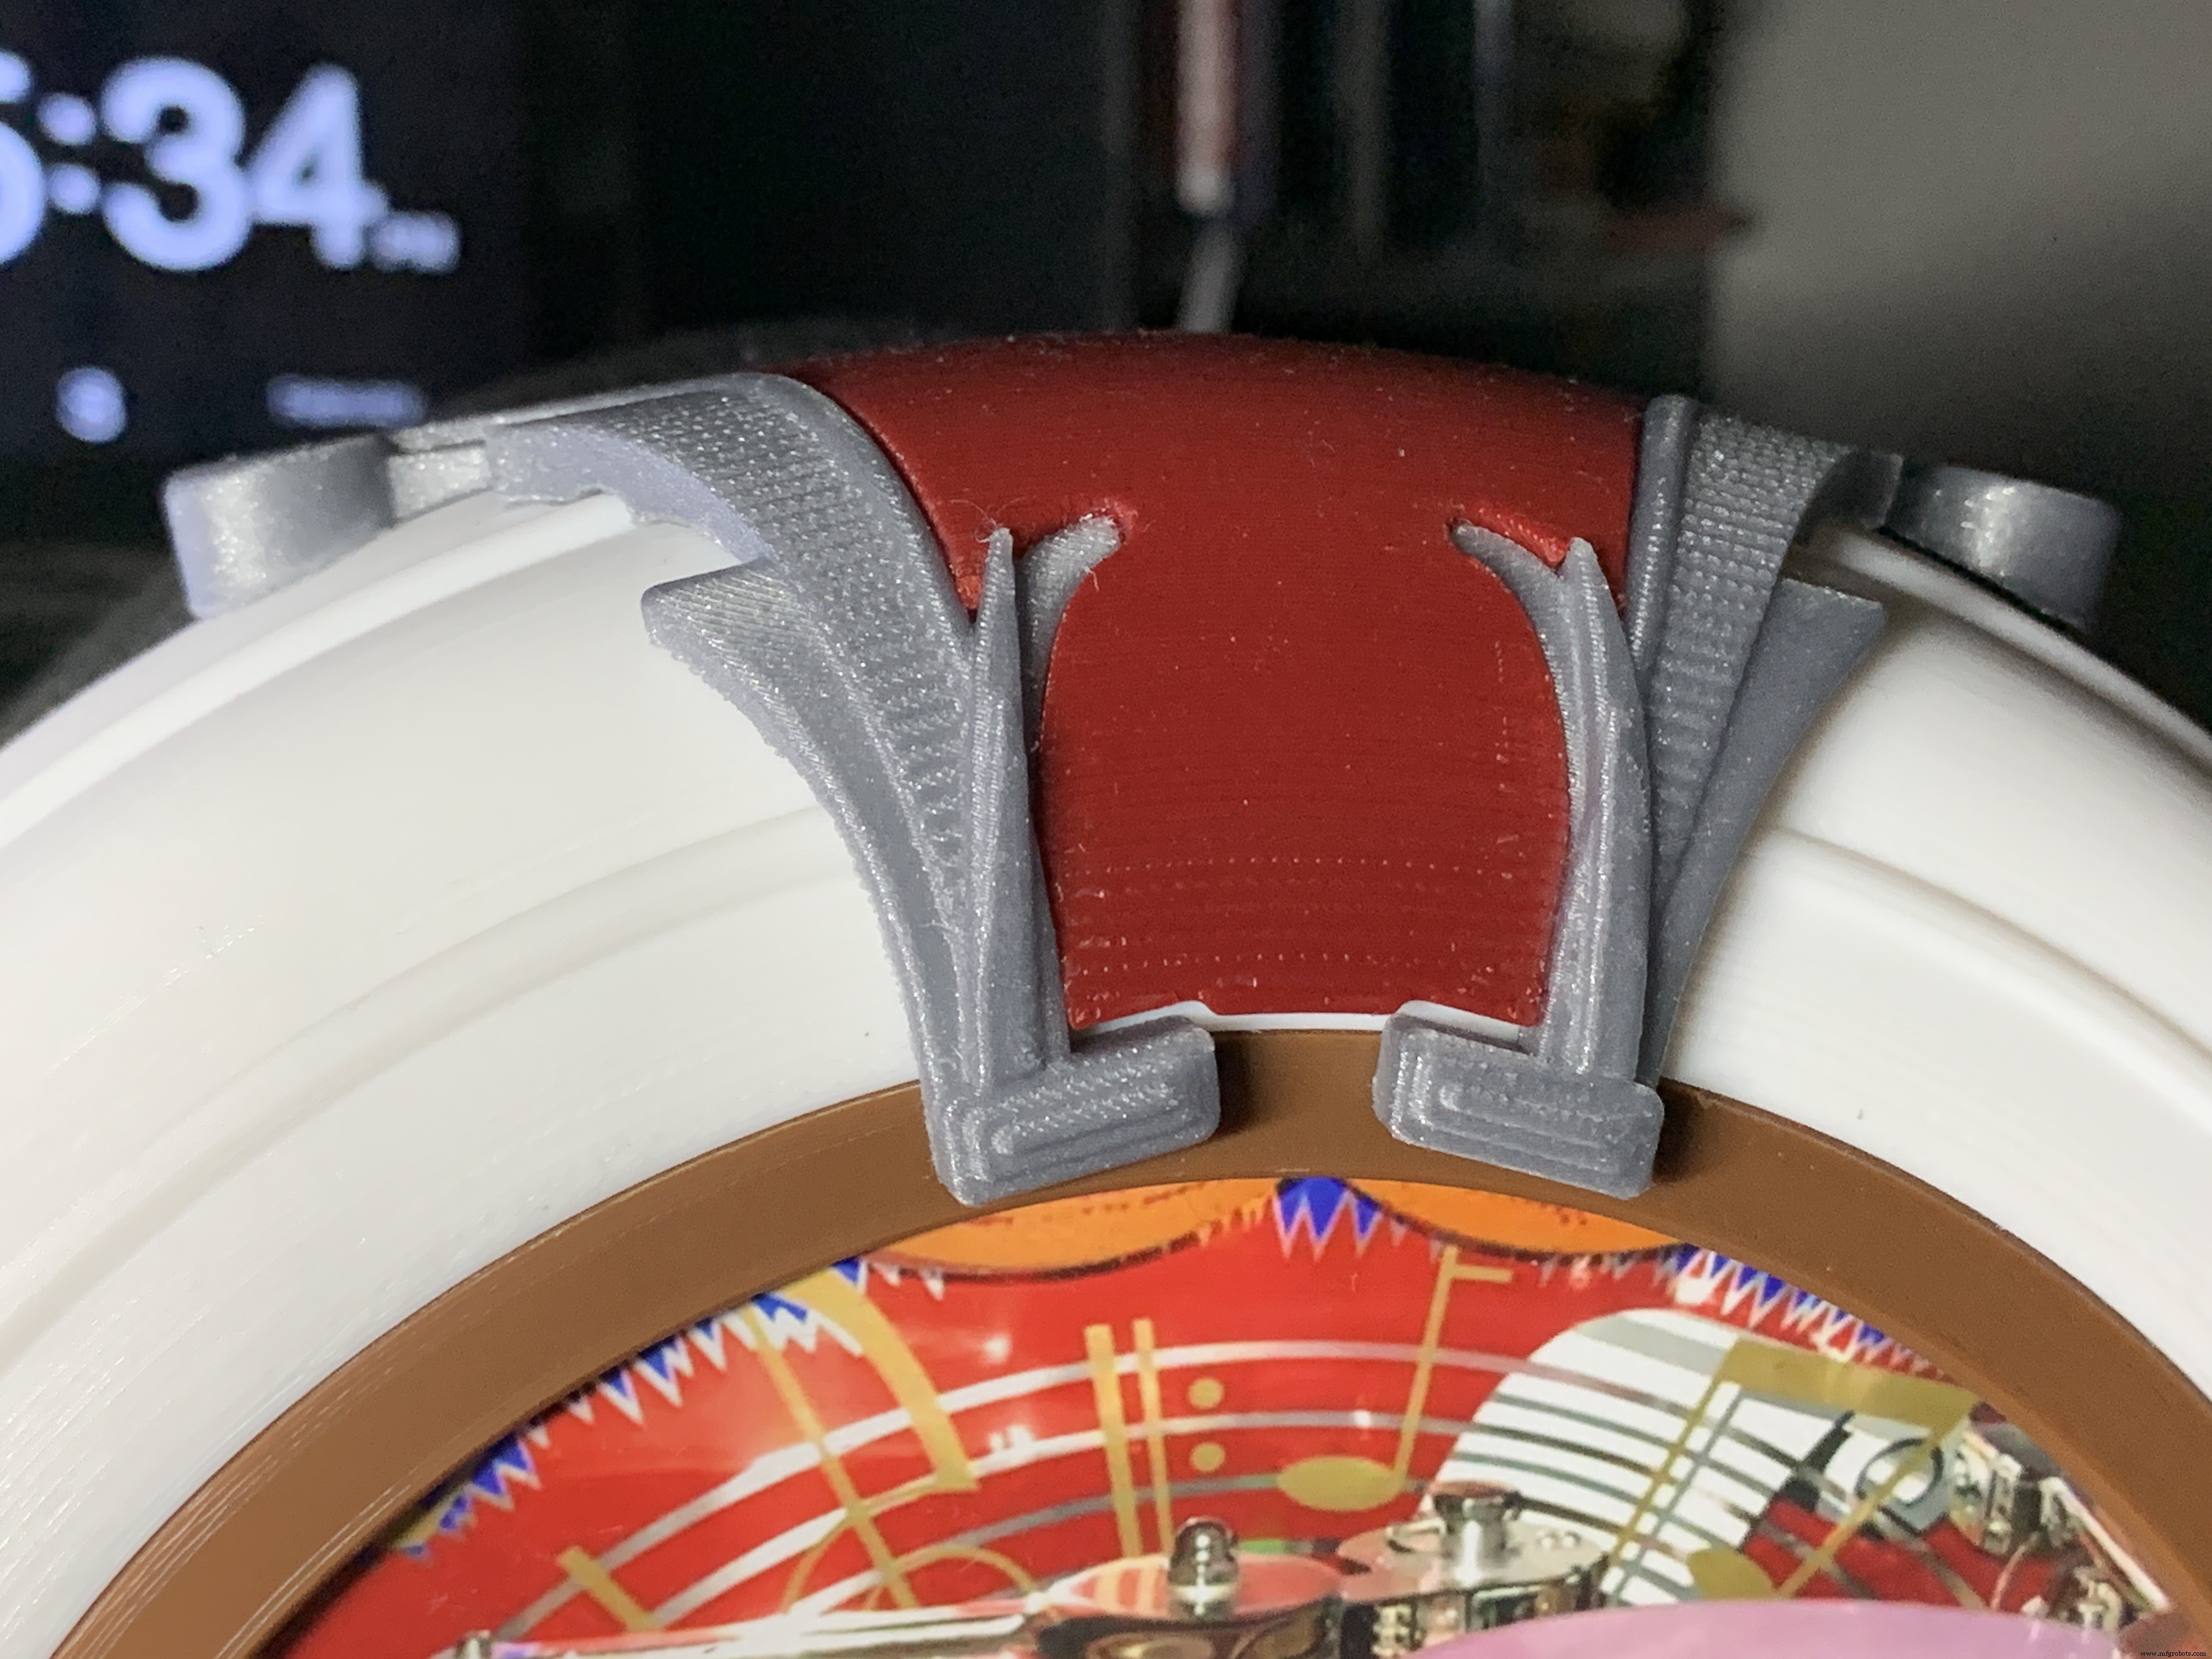
The Top Ornament (2 separate pieces) fits into the Top Red Ornament and is glued together as an assembly.
For alignment, make a pencil mark midway at the top of the Arch and another mark midway on the Top Red Cover. Align these two marks and glue.
Operation
Volumio has a fairly intuitive user interface that's easy to use.
To get started, press/select the 'Home' icon or the 'Browse' button from the 'Playback' window..You'll see something like the image below, depending on what options you have installed.
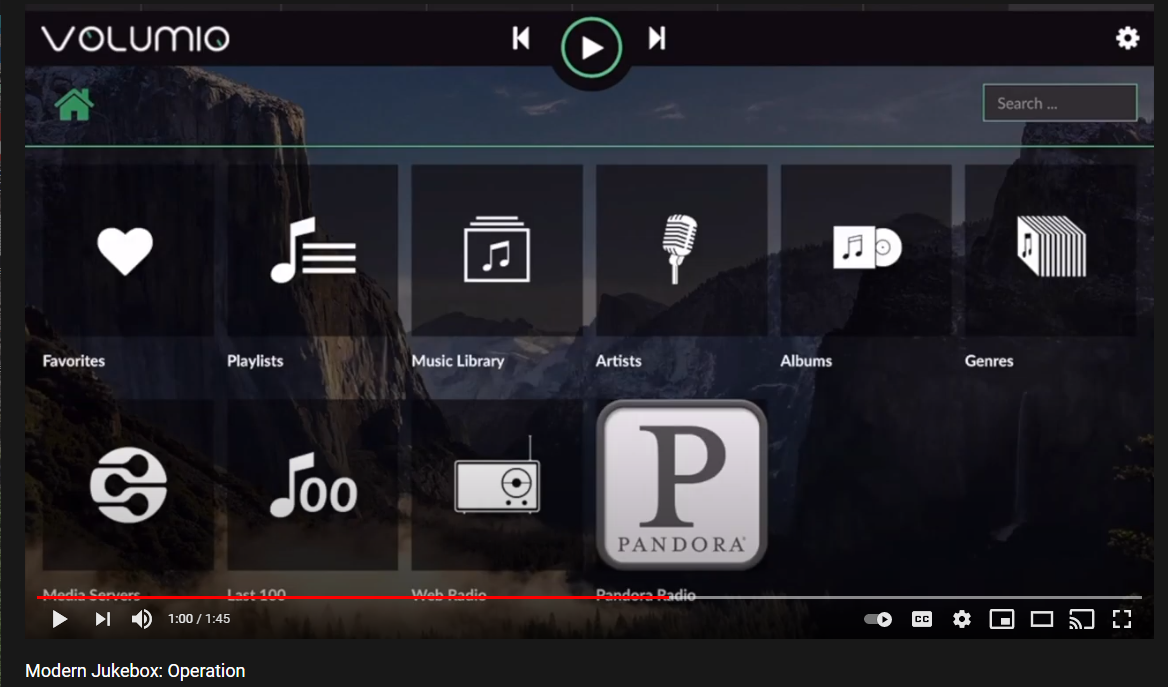
For Pandora and Spotify (paid subscription required), go to Settings/Plugins/Music Services. You can connect to Volumio from AirPlay with the Apple Music player.
Update September 20, 2021:
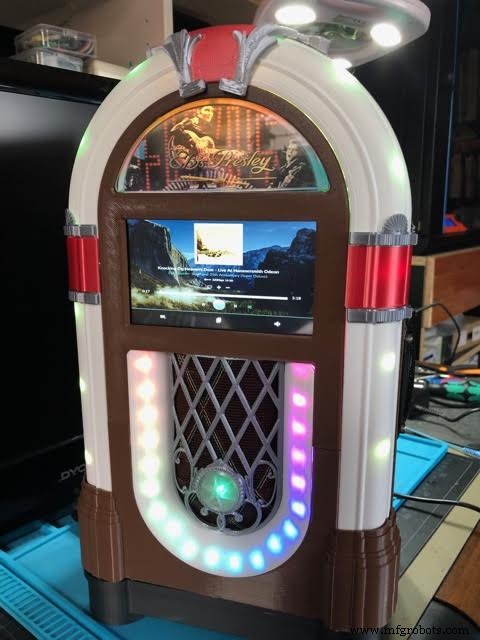
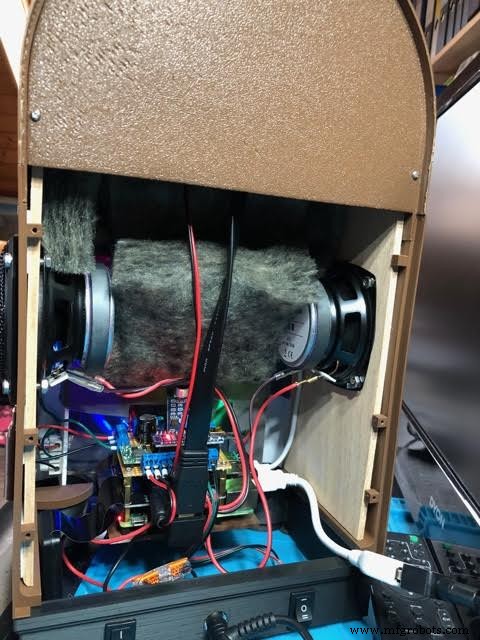
Raimund Trierscheid made a version of the Modern Jukebox, with improvements! Raimund added 5mm wood panels to the sides of the case to hold the heavy speakers and improve the sound.
Here are some photos:
Proses manufaktur
Fitur Utama Pabrik Batang Kawat modern Tujuan dari wire rod mill (WRM) adalah untuk memanaskan kembali dan menggulung billet baja menjadi batang kawat. Produksi batang kawat di pabrik batang kawat dapat berubah secara konstan. Tuntutan yang berkembang pada kualitas batang kawat serta pada fleksibi
Fitur Utama dari Hot Strip Mill modern Tujuan dari hot strip mill (HSM) adalah untuk memanaskan kembali dan menggulung lembaran tebal menjadi strip tipis dengan berbagai ketebalan. Karena ukurannya yang besar dan investasi yang besar, pabrik strip panas perlu memiliki masa pakai beberapa dekade. P
Penggulungan Baja di Pabrik Pengerolan Produk Panjang yang Modern Produk panjang adalah nama umum untuk (i) batang baja tulangan, (ii) produk batang baja berbentuk seperti bulat, datar, bujur sangkar, dan segi enam dll., (iii) produk penampang seperti sudut (sama dan tidak sama), saluran, balok, t
Fitur Utama Tungku Ledakan Berkapasitas Tinggi Modern Kinerja pabrik baja terintegrasi sangat bergantung pada kinerja unit pembuat besinya. Di pabrik baja terintegrasi, produksi logam panas (HM) dalam tanur tinggi (BF) adalah rute yang disukai secara global untuk pembuatan besi. Biaya spesifik pro